In this tutorial we will show how to use EasyIoT server MQTT client driver. MQTT client allows to connect EasyIoT server to different sensors with standard MQTT protocol.
MQTT is a machine-to-machine (M2M)/"Internet of Things" connectivity protocol. It was designed as an extremely lightweight publish/subscribe messaging transport. These characteristics make it ideal for use in constrained environments, for example, but not limited to:
- Where the network is expensive, has low bandwidth or is unreliable
- When run on an embedded device with limited processor or memory resources
In this example we will configure MQTT client driver to connect to public MQTT broker and then create one publish and one subscribe topic in EasyIoT server. In user interface we will change one topic (publish) and see if we receive change to subscribed topic and see change in EasyIoT server WEB interface. In real word this scenario makes no sense and it is shown just to learn how to configure MQTT client driver. Usually we subscribe and connect to sensors or some other software which implement MQTT broker.
First login to EasyIoT server interface and go to Configure->Driver->MQTT client driver and enable driver.
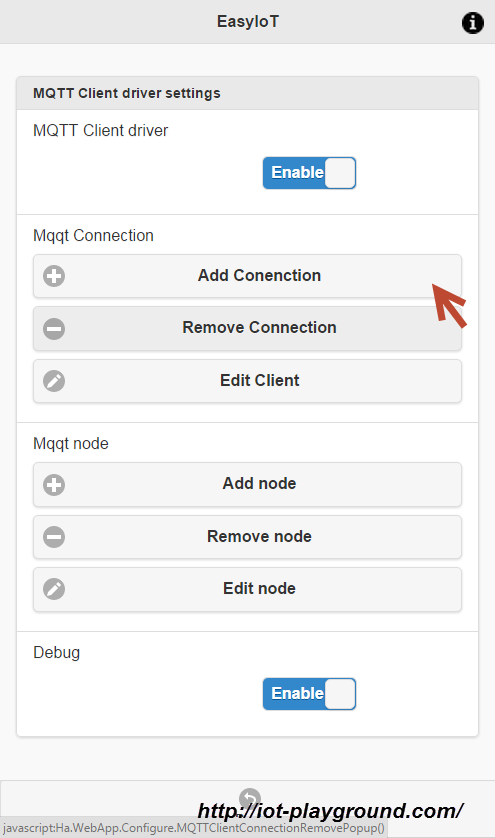
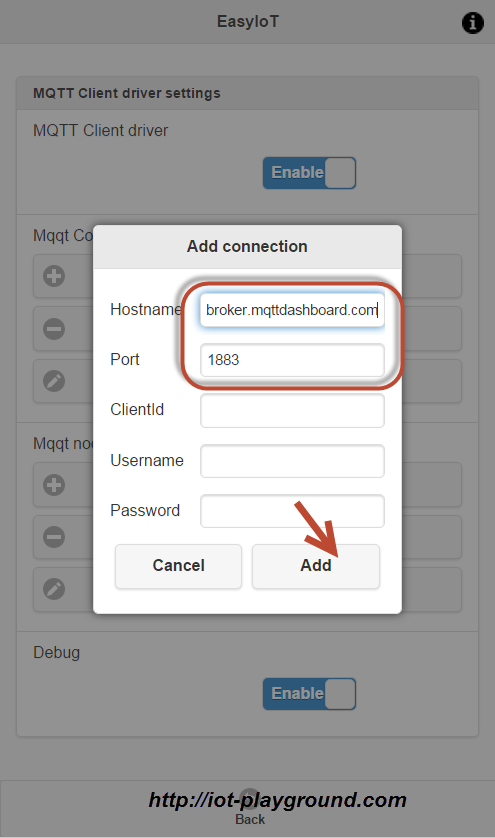
Then add connection to MQTT broker (button Add connection). In our example we will connect to public MQTT broker available at broker.mqttdashboard.com. In your case you can use any other MQTT broker. Our broker does not require authentication so we leave username and password blank.
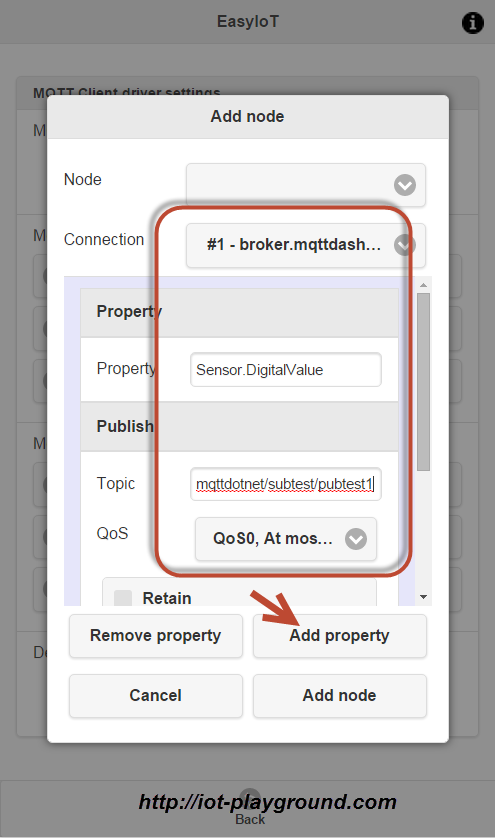
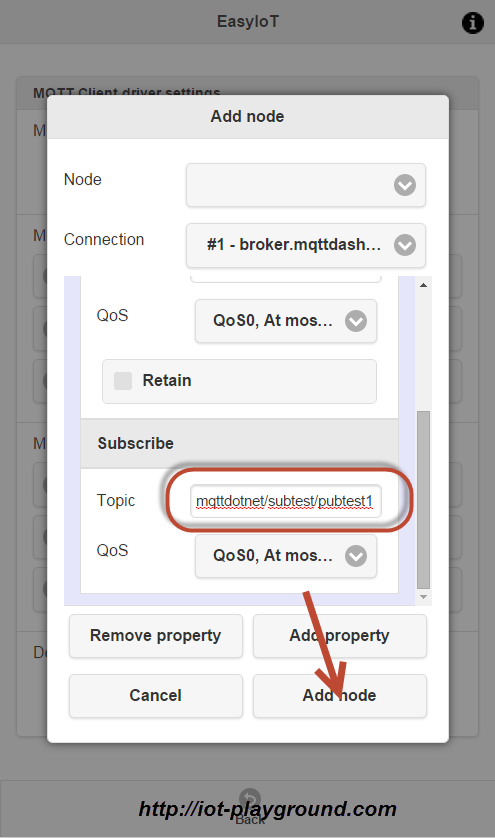
Next we will add MQTT publisher. Press button Add Node. This will add EasIoT server generic node. Select MQTT connection related to MQTT node. In our case we will select connection #1 broker.mqttdashboard.com. Then press add property to add property to this node. Name property "Sensor.DigitalValue" and add publisher topic in our case "mqttdotnet/subtest/pubtest1". Node property is now linked with publish topic. Change property to suits your sensor type and topic to suits your need. "Sensor.DigitalValue" is property suitable for Digital output node type. At the end press button Add node. Now we add one EasyIoT server node with one publish topic.
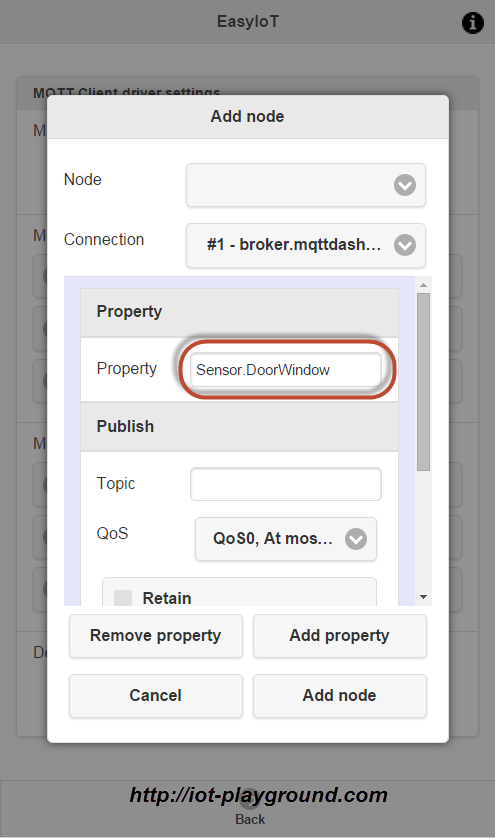
Next we will add one more EasyIoT server node subscribed to the same topic to display value of topic. We again press button Add Node and Add property and select same connection #1 broker.mqttdashboard.com. Name property "Sensor.DoorWindow" and enter subscribe topic "mqttdotnet/subtest/pubtest1". Node property is now subscriped to topic. At the end press button Add Node to add node to EasyIoT server.
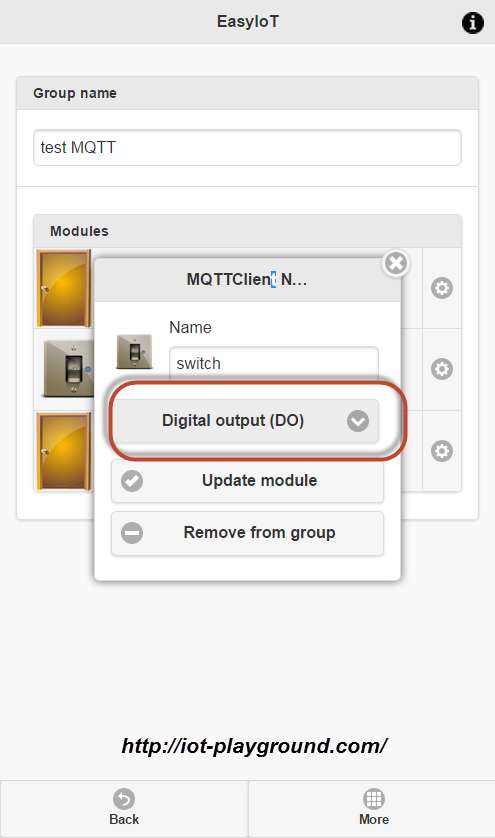
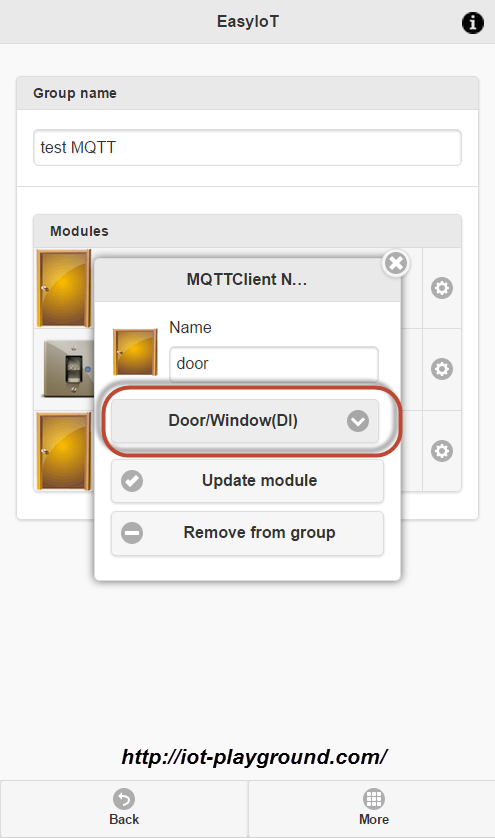
Now we added two nodes one with publish topic and one with subscribe topic. Next we add MQTT group and add newly created nodes. At the end we change node types. By default MQTT client drivers nodes are Generic types. We change this types to Digital output and Door/window sensor type.
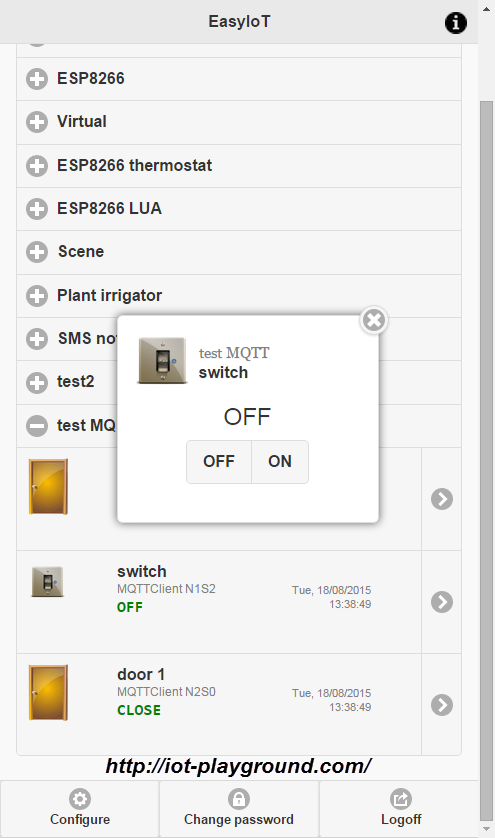
We can test our MQTT client driver. Switch on and off digital switch in EasyIoT server WEB interface and see if door/window status is changing.
Forum discussion about MQTT client driver http://iot-playground.com/forum/mqtt-client-driver
See more tutorials at http://iot-playground.com/build
Buying guide
To support this site and EasyIoT framework development please buy in our store.

 $41.99
Raspberry Pi 512MB Model B +
Raspberry Pi Model B+, ARM1176JZF-S Running at 700MHz, 512MB RAM.


Prototyping Shield Module For Raspberry Pi
To build custom sensors and NRF24L01 transmitter/receiver on Raspberry Pi.


Comments
Thanks
MQTT driver is in v0.9 beta
iot-playground.com/forum/beta-release/329-beta-v0-9bx
How to add ?
RSS feed for comments to this post