In this tutorial we will show how to build WiFi touch screen thermostat. ESP8266 WiFi touch screen thermostat is example of complex sensor build by ESP8266 EasyIoT Arduino library. We will use Arduino Mega 2560 and TFT 3.2" touch screen display. You will be able to access and control thermostat securely from remote locations. Thermostat will also show some additional data, like outdoor temperature, air pressure and weather forecast.
Improved version is here: ESP8266 WiFi touch screen thermostat (EasyIoT Coud)
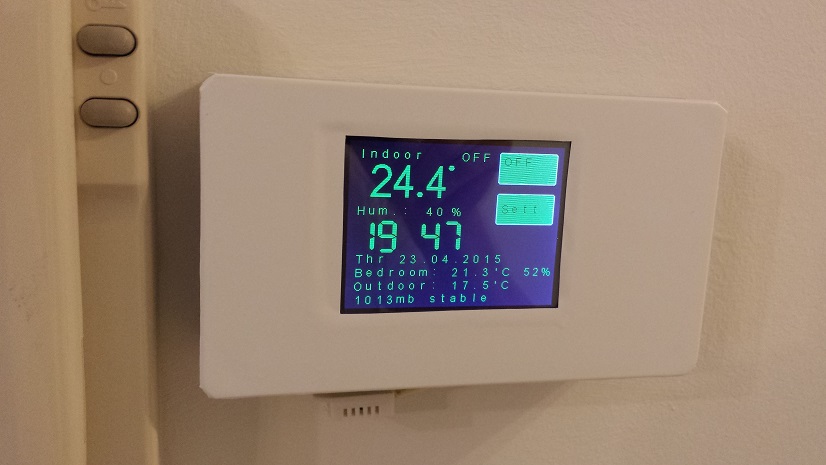
Main features of thermostat
- 6 modes - Auto, Off, LOLO, LO, HI, HIHI
- Touch screen
- WiFi connected
- Four set temperatures (LOLO, LO, HI, HIHI) and weekly schedule
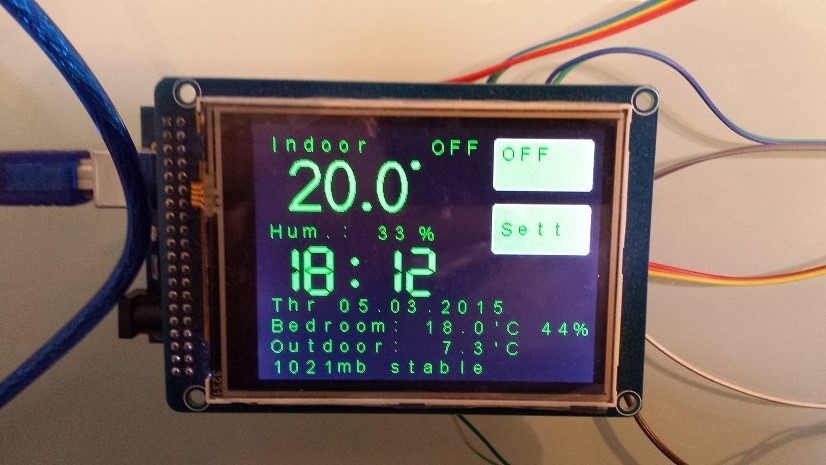
- Time display
- Additional data display - temperature in other room, air pressure and weather forecast
Materials
-Arduino Mega 2560
| Arduino Mega 2560 | |
$9.97  | |
$6.99  |
-ESP8266 WiFi module
| ESP8266 ESP-01 Serial WIFI Wireless Transceiver Module | |
| $2.11 | |
| $17.00 |
| ESP8266 ESP-03 Serial WIFI Wireless Transceiver Module | |
| $2.07 | |
| $2.15 |
| ESP8266 ESP-12 Serial WIFI Wireless Transceiver Module | |
| $2.06 | |
| $1.75 |
| ESP8266 ESP-05 Serial WIFI Wireless Transceiver Module | |
| $1.88 |
| ESP8266 ESP-07 Serial WIFI Wireless Transceiver Module | |
| $2.18 | |
| $1.88 |
-BMP180 Digital Barometric Pressure Sensor
| BMP180 Digital Barometric Pressure Sensor | |
| $1.22 | |
| $1.29 |
-DHT22 Digital Temperature And Humidity Sensor
| DHT22 Digital Temperature And Humidity Sensor | |
| $2.67 | |
| $2.45 |
-1 Channel Isolated 5V Relay Module
| 1 Channel Isolated 5V Relay Module | |
| $1.34 | |
| $1.12 |
-RTC DS1302 Real Time Clock Module
| RTC DS1302 Real Time Clock Module | |
| $0.99 | |
| $0.82 |
-3.2" TFT LCD Module Touch Panel+ TFT 3.2" LCD Shield Expansion Board For Arduino
| 3.2 TFT LCD + 3.2 TFT LCD Shield | |
| $22.99 | |
| $15.45 |
See buying guide at the end for details and please shop in our store to support EasyIoT framework.
Build
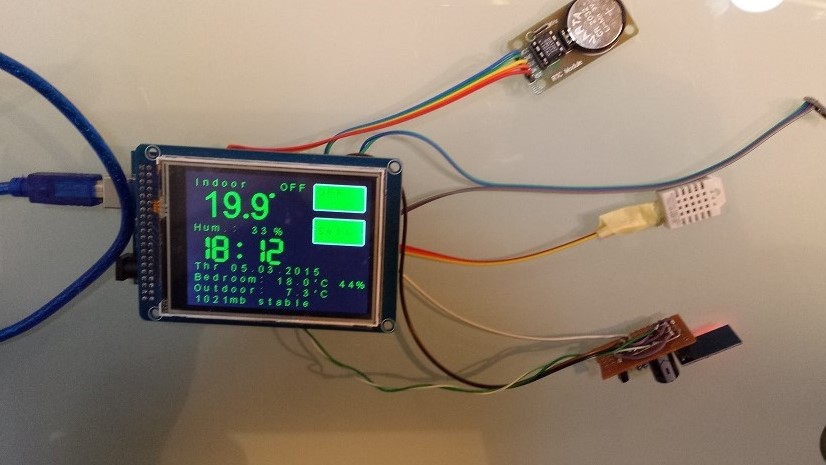
Connections
Arduino Meaga 2560 TFT display
This is easy, because we will use shield. Just put TFT 3.2" LCD Shield Expansion Board and 3.2" TFT LCD Module Touch Panel on top of Arduino Mega 2560.
ESP8266
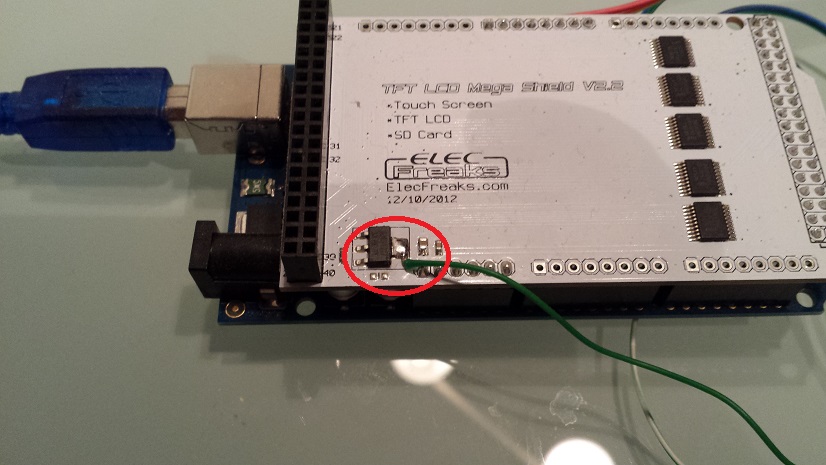
In this case we will use HW serial1 to connect ESP8266 module. Follow Connenct 5V Arduino and ESP8266 tutorial to connect ESP module to Arduino. Arduino Serial1 RX pin is 19, Tx 18 and Reset pin is 12. For 3.3V power supply we will use 3.3 V from TFT shield expansion board. See picture below where to connect 3.3 V.
BMP180
| Arduino | BMP180 module |
| VCC | VCC |
| GND | GND |
| 20 | SDA |
| 21 | SLC |
DHT22
| Arduino | DHT22 |
| VCC | 1 VCC |
| GND | 4 GND |
| 8 | 2 DATA |
Relay module
Relay module input is connected to pin 13 on Arduino. We also connect VCC and GND.
RTC DS1302
| Arduino | DS1302 |
| VCC | VCC |
| GND | GND |
| 11 | CE |
| 10 | IO |
| 9 | CLK |
Source Code
Source code can be found at GitHub.
Code corrections
First we should correct altitude to display correct air pressure. Altitude is in meters.
#define ALTITUDE 301.0
Next we correct time zone to display correct time. Thermostat will synchronize it's time automatically when connected to EasyIoT server. Default timezone is CET, correct this code lines according to your timezone:
TimeChangeRule CEST = {
"CEST", Last, Sun, Mar, 2, 120}; //Central European Summer Time
TimeChangeRule CET = {
"CET ", Last, Sun, Oct, 3, 60}; //Central European Standard Time
Timezone tzc(CEST, CET);
Also don't forget to set access point username and password and server IP address in EasyIoT library.
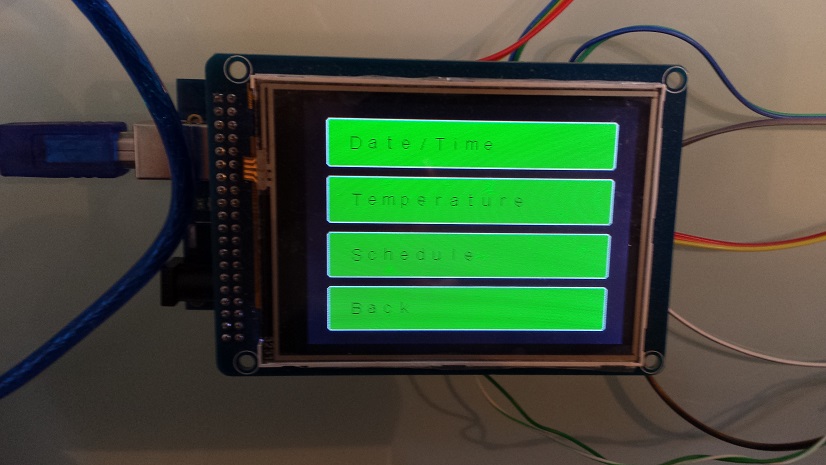
Configure EasyIoT server
Go to EasyIoT server Web interface to Configure->Drivers->ESP8266 EasyIoT driver and press button Add Node.
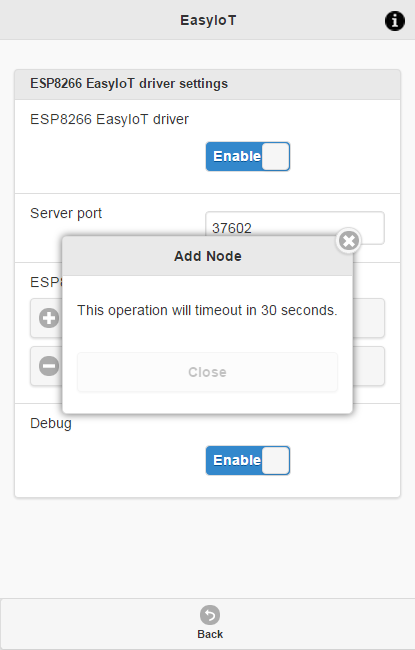
If you successfully added node you should see node addresses (no timeout message).
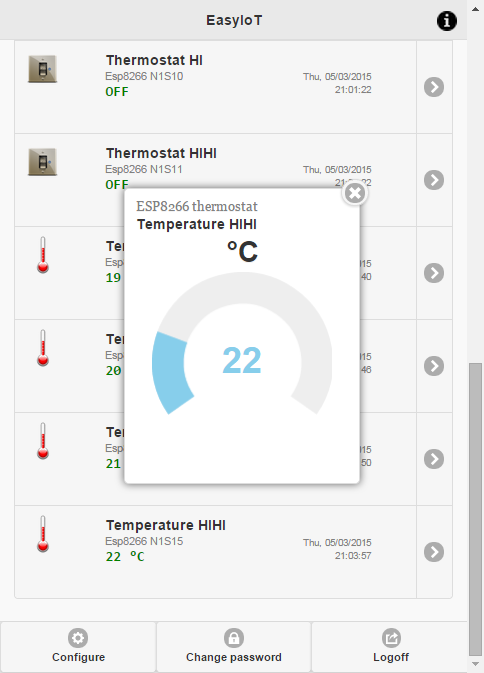
Then add new sensor nodes to one of groups. If you done everything correctly you can see thermostat on front Web page. Now you can control and monitor your room temperature remotely.

Automation
Our thermostat also shows temperature and humidity in another room and outside. To get temperature and humidity on thermostat we write automation script on EasyIoT server. See EasyIoT server automation manual how to add script. Script is below, correct sensor addresses according to your configuration.
/*
This code is running one time when program is enabled
*/
public void Setup()
{
EventHelper.ModuleChangedHandler((o, m, p) =>
{
// outdoor
if (m.Domain == Domains.MYSENSORS && m.Address == "N5S0" && p.Property == "Sensor.Temperature")
DriverHelper.ProcessCommad(Domains.ESP8266, "N1S4", "ControlLevel", p.Value);
// bedroom
if (m.Domain == Domains.MYSENSORS && m.Address == "N7S0" && p.Property == "Sensor.Temperature")
DriverHelper.ProcessCommad(Domains.ESP8266, "N1S3", "ControlLevel", p.Value);
if (m.Domain == Domains.MYSENSORS && m.Address == "N7S1" && p.Property == "Sensor.Humidity")
DriverHelper.ProcessCommad(Domains.ESP8266, "N1S5", "ControlLevel", p.Value);
return true;
});
}
/*
This code is running periodicaly when program is enabled.
Cron job detirmine running period.
*/
public void Run()
{
}
Future improvements
This is first version of thermostat. For future versions there is idea to add multiple zones to thermostat. Also display graphic design is basic. If we use SD card attached to TFT display we can create screens with nice graphic.
See more tutorials at http://iot-playground.com/build
Improved version is here: ESP8266 WiFi touch screen thermostat (EasyIoT Coud)
Buying guide
To support this site and EasyIoT framework development please buy in our store.


Comments
#include
#include
#include
Thanks
Thanks for the project.
I'm trying to compile the code without any succes.. pleased to ge any help.
esp8266_touch_screen_thermostat:35: error: expected ',' or '...' before '&' token
esp8266_touch_screen_thermostat:35: error: ISO C++ forbids declaration of 'Esp8266EasyIoTMsg' with no type
esp8266_touch_screen_thermostat:29: error: conflicting declaration 'uint8_t SevenSegNumFontPlus []'
C:\Users\pedro\OneDrive\Documentos\Arduino\libraries\UTFT/SevenSegNumFontPlus.h:8: error: 'SevenSegNumFontPlus' has a previous declaration as 'const uint8_t SevenSegNumFontPlus [2204]'
esp8266_touch_screen_thermostat:31: error: conflicting declaration 'uint8_t SevenSeg_XXXL_Num []'
C:\Users\pedro\OneDrive\Documentos\Arduino\libraries\U..........
hi ioannis.
where are you find all this libraries?
i cant find some of libraries that i need for complile. can you help mi to find?
Last gives me an error "expected unqualified-id before '.' token" on line 255
I could really use some help locating the following libraries.
//#include
//#include
//#include
Thank you in advance.
SevenSegNumFontPlus.h
SevenSeg_XXXL_Num.h
arial_normal.h
In the end I just deleted these three lines and it compiled without a problem. I do not know why this works but it does. Using Arduino 1.6.7
Yes. This is framework, you can build your own sensors connected to ethernet or mysensors network.
RSS feed for comments to this post