EasyIoT Cloud has interesting feature. User can configure module appearance in WEB interface. In this tutorial we will show show to create new module type.
To understand this tutorial basic knowledge of HTML and javascript is required. It's not aim of this tutorial to teach you HTML and javascript - there are many tutorials on the web if you need additional help.
When we create new module under EasyIoT Cloud configuration (Configure->Modules->Add module), we declare module type. Module Type defines module presentation in Web interface or native mobile app. There are listed standard module types starting with MT_* prefix. Standard types are AI, AO, DI, DO dimmer and so on. If we want to represent new module type, we can create new module type, and then use it in module configuration.
In this tutorial we will show how to create new module type for irrigation system. Our irrigation system has soil humidity sensor, settings for soil humidity threshold, auto/manual mode and pump motor.
We will use four parameters:
- Sensor.Parameter1 - Soil humidity threshold - AO
- Sensor.Parameter2 - Irrigator mode auto/manual - DO
- Sensor.Parameter3 - Pump motor - DO
- Sensor.Parameter4 - Soil humidity - AI
Soil humidity threshold will be represented in WEB interface as slider (AO - analog output), irrigation mode as switch (DO - digital output) and also pump motor will be represented as switch (DO - digital output). Soil humidity will be represented as value in WEB interface.
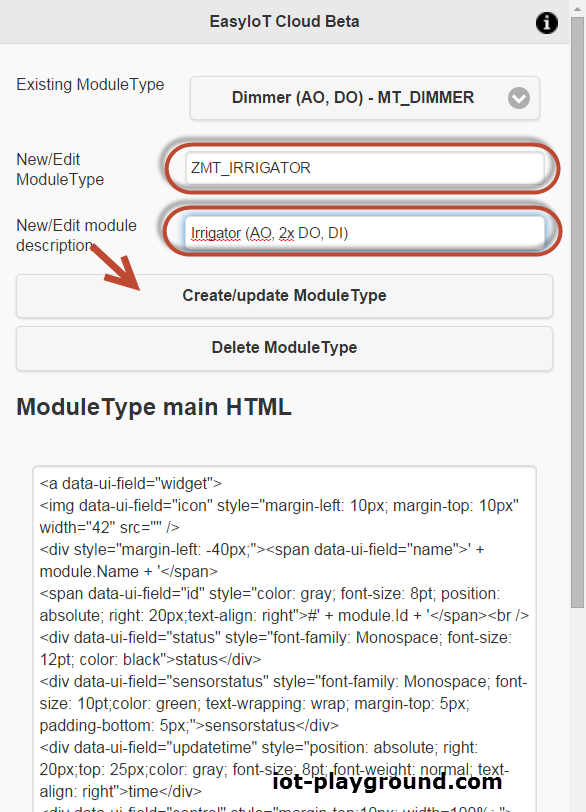
To create new type go in Web interface to to Configure->Module types. The easiest way to create new module type is to copy existing module type and modify it. For our template we will select module type MT_DIMMER which uses AO and DO. Next change name to ZMT_IRRIGATOR and description to Irrigator (AO, 2x DO, DI) and press button Create/update module type.
Now you should see new module type.
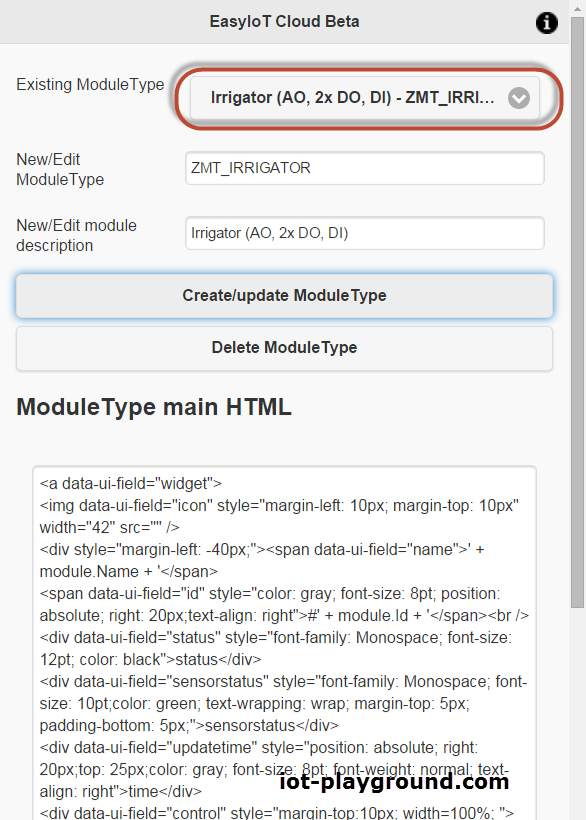
New module type is the same as MT_DIMMER. To change representation in WEB interface we change HTML code for module. This can be done in Module Type main HTML editor.
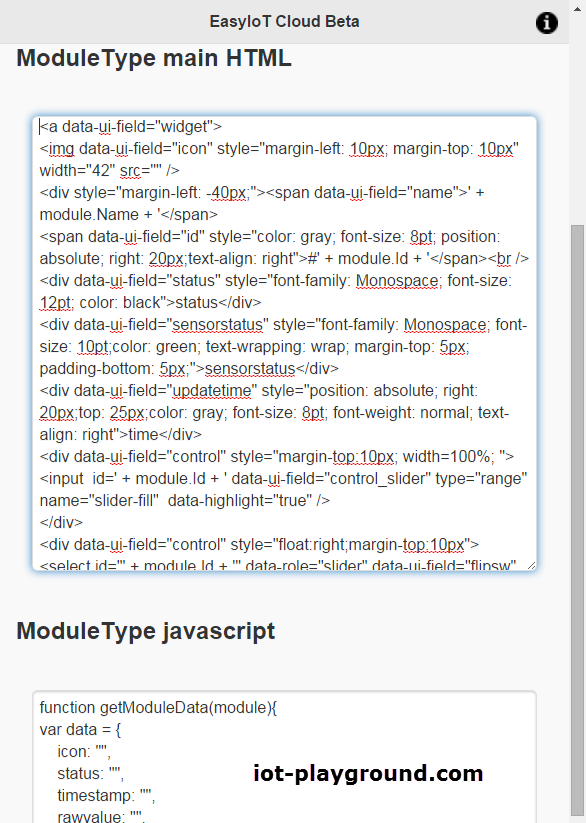
At the begining is HTML code for common module representation like image status, time stamp and so on. We will keep this part. We will add new switch for module pump and modify switch for auto/manual mode. Here is modified code:
Modified parts are under comments <!-- mode auto/manual --> and <!-- motor pump --> Basically we add two slide switches.
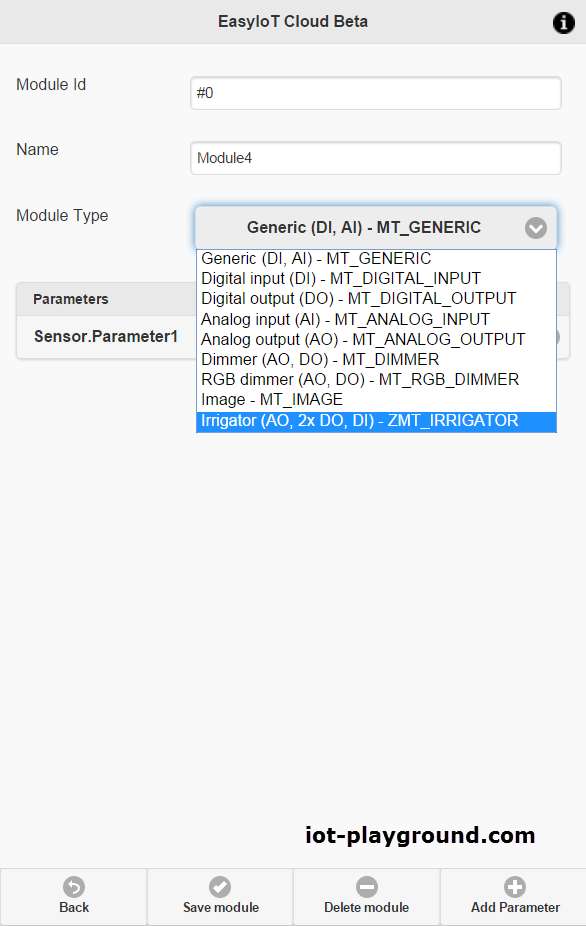
If you done everything right, you can try new module type in new module. Add new module under Configure->Modules and press button Add module. Under new module set module type ZMT_ITRIGGATOR. Also add additional parameters (Sensor.Parameter1, Sensor.Parameter2, Sensor.Parameter3, Sensor.Parameter4).
Next add newly created module to one of groups under Configure->Module groups. Select one group and add module in group. In our case we added module under Default group. Go back on main page and you should see our module with slider and two switches.

If everything is correct, we continue customizing our new module type. New module type as it is is now static - values are not changing dependent on sensor parameters. To correct this we need to edit javascript in module type editor. Go to module type editor (Configure->Module type and select ZMT_ITRIGGATOR) and correct javascript code in ModuleType javascript window.
Here we have javascript functions which are called in EasyIoT cloud WEB interface. Javascript functions are:
- initControl - it is called when initializing WEB control
- getModuleData - to get module data
- updateControl - update control values based on module data
In javascript program we use helper function to access or send module data. Some of functions are:
Eiot.WebApp.Utility.GetModulePropertyByName - to get module property by name
Eiot.Data.ServiceCall - to send parameter data to EasyIoT Cloud
In our program we first modify initControl function. The most important modification here is to add event on flip switch to send motor pump state. Next we change getModuleData function. We modify part which display module status and motor pump switch. In updateControl we correctly update module status with data previously stored in getModuleData function.
Full program is here:
Before we check new module type in WEB interface also correct parameter in module configuration. On module parameter Sensor.Parameter4 set Description to Sensor hum. and unit to %. If everything is correctly you should see module like this in front page:
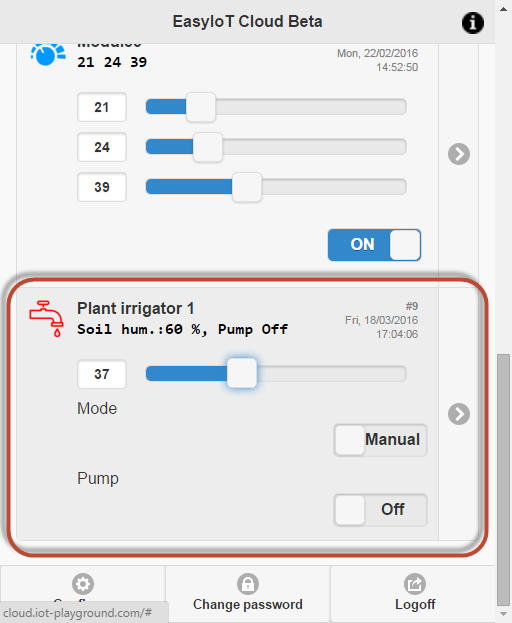
Values are changing dependent on values in sensor parameters or switch states. New module type is visible only in WEB interface. On native mobile application is visible as generic module.
In next tutorial we will show how to build HW for irrigation system based on ESP8266 and ESP8266 Arduino IDE.
See more tutorials at http://iot-playground.com/build
Comments
I cant make everything visible.
No, but you can build your own control for roller shutter.
Is there a module preconfigured for managing roller shutter?
RSS feed for comments to this post