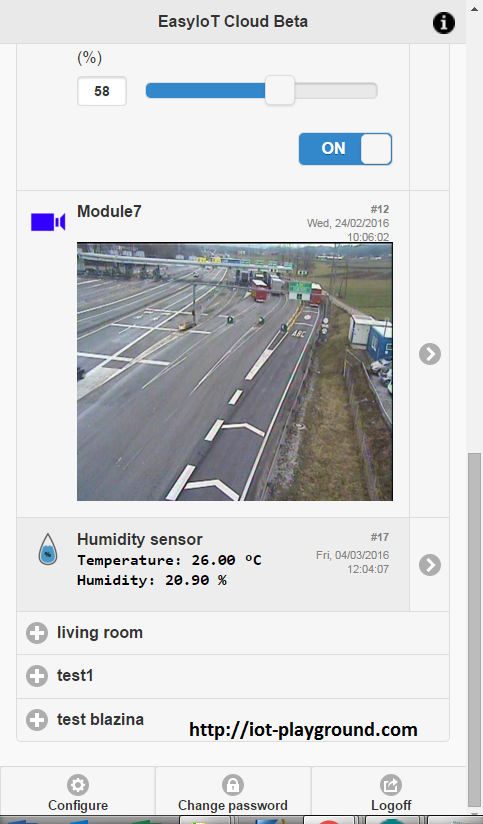
In this tutorial we will show how to build "Plug and Play" WiFi humidity and temperature sensor connected in EasyIoT Cloud. It shows how to send two parameters with one request with REST API V1. We will use ESP8266, DHT22 and Arduino IDE.
Contents
Introduction
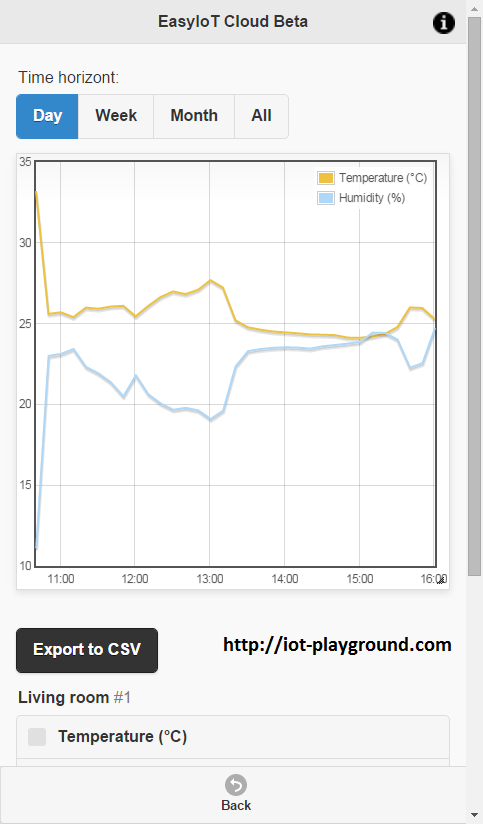
Historical temperature and humidity chart. Data can be exported to CSV.
Materials
-ESP8266 WiFi module
| ESP8266 ESP-01 Serial WIFI Wireless Transceiver Module | |
$2.11  | |
$17.00  |
| ESP8266 ESP-03 Serial WIFI Wireless Transceiver Module | |
$2.07  | |
$2.15  |
| ESP8266 ESP-12 Serial WIFI Wireless Transceiver Module | |
$2.06  | |
$1.75  |
| ESP8266 ESP-05 Serial WIFI Wireless Transceiver Module | |
$1.88  |
| ESP8266 ESP-07 Serial WIFI Wireless Transceiver Module | |
$2.18  | |
$1.88  |
| ESP8266 Lua Nodemcu WIFI Network Development Board | |
$7.43  | |
$2.65  |
-DHT22 humidity sensor
| DHT22 Digital Temperature And Humidity Sensor | |
$2.67  | |
$2.45  |
-3.3V power supply (battery or regulator)
| 5pcs 3.3V regulator module 800mA | |
$1.12  | |
$1.56  |
| 2xAA 3V Battery Holder Box Case Wire | |
$0.99  | |
$0.99  |
See buying guide at the end of tutorial for details.
Program
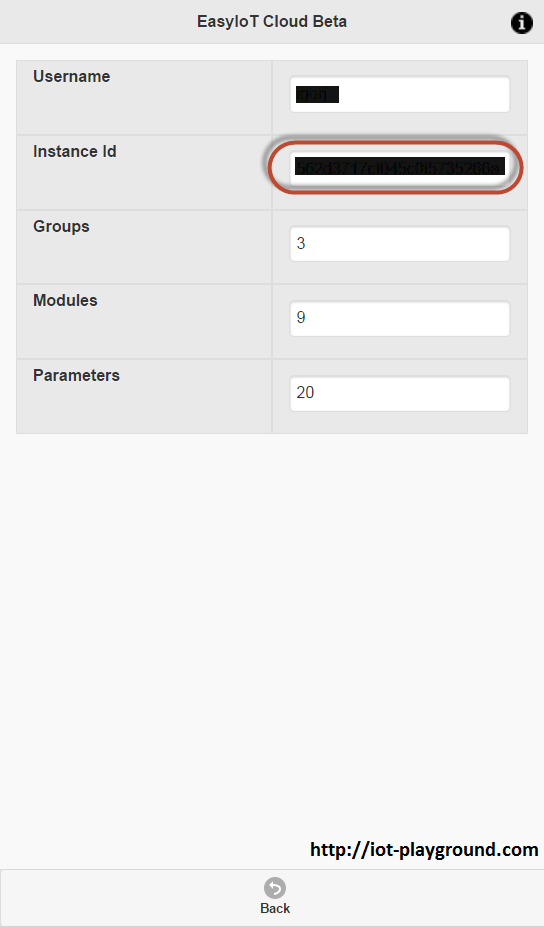
First we need to register to EasyIoT Cloud. After registration we do not need any other configuration, because sensor is "Plug and Play". We just need to remember Instance Id which is visible under Config->User Info.
Program is written in Arduino ESP8266 IDE. See Arduino ESP8266 IDE tutorial how to connect ESP8266 module to computer to upload program. Program is available at our GitHub. You will also need DHT22 library and REST API V1 library. Be sure to use library from our GitHub, because it's ported to Arduino ESP8266 IDE.
In program change Access Point username and password and Instance Id. Instance Id is under Config->User Info.
Instance id:
// change those lines
#define AP_USERNAME "xxx"
#define AP_PASSWORD "xxx"
#define INSTANCE_ID "xxx"
If you are using Fahrenheit instead of Celsius use dht.toFarenheit(temp) function to report temperature in Fahrenheit.
First time when you connect sensor to power supply it will connect to access point and check module id. If module id is 0, then program will call REST API functions to get new token, adds new module and configure its parameters. Module Id and token are then stored in EEPROM. If module is already added to cloud (module id is different than 0), then program will skip this procedure and just read module parameters Id's. Then it reads temperature and humidity and sends it to Cloud in one POST. API function to post more parameter values is SetParameterValues.
Hardware
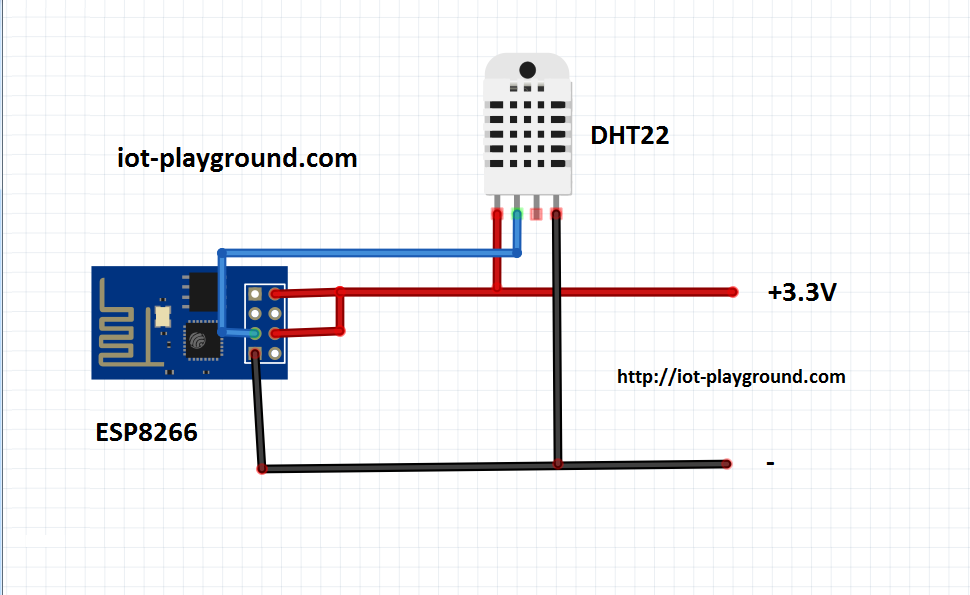
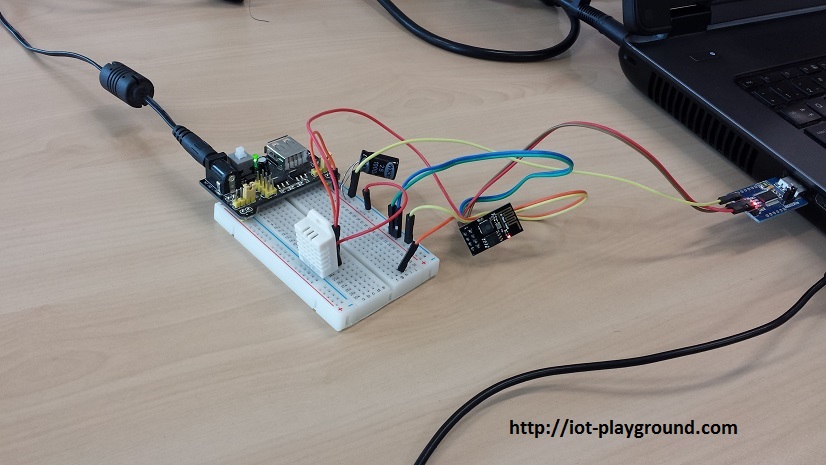
Connection diagram is shown below. Instead of ESP8266-01 you can use different type of ESP8266. For power supply you can use 2 AA batteries or 3.3V regulator (see buying guide).
See more tutorials at http://iot-playground.com/build
Buying guide
To support this site and EasyIoT framework development please buy in our store.
Comments
How to solve outside and the bedroom temperature? You have connected only one temperature sensor. In the text code you have it. Can I solve wireless?
Thank you
#define AP_PASSWORD "xxx"
please rename this to
#define WIFI_NAME "xxx"
#define WIFI_PASSWORD "xxx"
I spent two o'clock to understand that this is not your login and password on the application (AP)
how can i add a Battery monitor to this Project
i am not a realy good programmer
thx
Before the upload I've changed the AP user and password and the instance_id. I've also changed the DHT pin from 2 to 4, to match the connections on the D1 mini.
After the upload I'm getting this on the serial monitor:
http://i.imgur.com/PyxIvei.png
Can you help me please?
RSS feed for comments to this post