In this tutorial we will show how to build DS18B20 and ESP8266 temperature sensor without Arduino. We will use Arduino IDE and report temperature over WiFi on EasyIoT server.
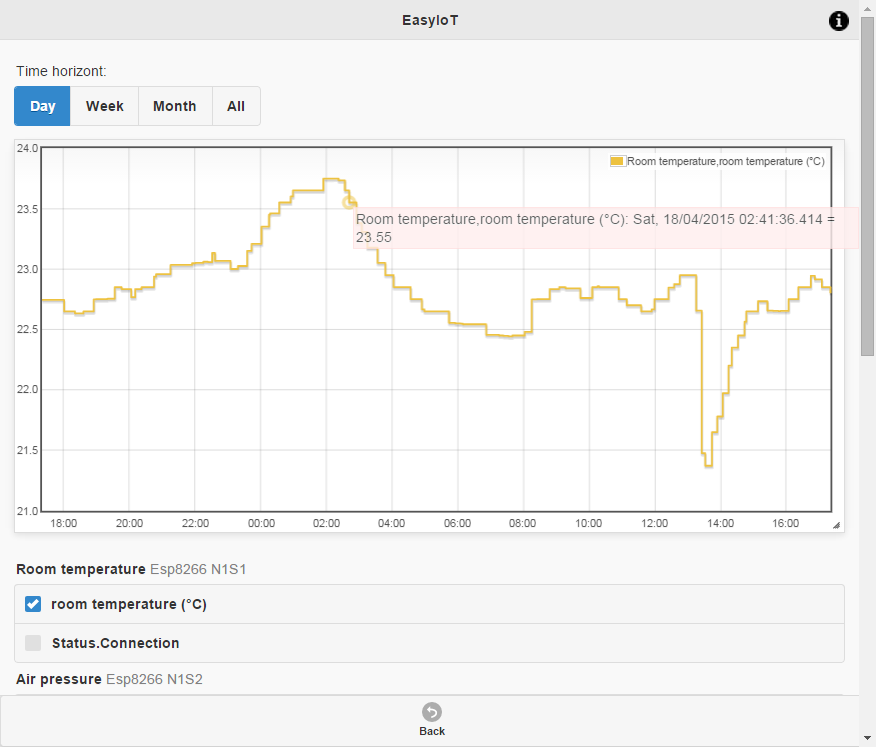
Sensor temperature is visible in EasyIoT server Web interface. If data logging is enabled you can see temperature chart.

Materials
ESP8266 WiFi module
| ESP8266 ESP-01 Serial WIFI Wireless Transceiver Module | |
$2.11  | |
$17.00  |
| ESP8266 ESP-03 Serial WIFI Wireless Transceiver Module | |
$2.07  | |
$2.15  |
| ESP8266 ESP-12 Serial WIFI Wireless Transceiver Module | |
$2.06  | |
$1.75  |
| ESP8266 ESP-05 Serial WIFI Wireless Transceiver Module | |
$1.88  |
| ESP8266 ESP-07 Serial WIFI Wireless Transceiver Module | |
$2.18  | |
$1.88  |
| ESP8266 Lua Nodemcu WIFI Network Development Board | |
$7.43  | |
$2.65  |
DS18B20 temperature sensor
| DS18B20 DALLAS Temperature Sensor | |
$0.99  | |
$0.79  |
| DS18B20 DALLAS Waterproof Temperature Sensor | |
$1.4  | |
$1.80  |
| DS18B20 Temperature Sensor module | |
$1.89  |
4.7K resistor
| 400X 0.25w 1/4w Metal Film Resistor Pack Kit 1% 20 Value Each 20 Pcs 10 ~ 1M ohm | |
$1.88  | |
$5.50  |
See buying guide at the end of tutorial.
EasyIoT server configuration
In EasyIoT server add new node in Virtual driver. Node type is Temperature (AI). Tutorial how to add node to EasyIoT server can be found here. Remember Virtual node address, because you will need it later.
Program
Program is available at GitHub. It is based on program contributed by community member @Dennis. To load program you will need ESP8266 Arduno IDE. Read Arduino ESP8266 IDE tutorial how to program ESP8266 in Arduino IDE.
In program you will need to change some settings. First set your AP username and password:
#define AP_SSID "your ssid"
#define AP_PASSWORD "your AP password"
Next change settings related to EasyIoT server like username, password, IP address, port and node address. Change following lines:
#define EIOT_USERNAME "admin"
#define EIOT_PASSWORD "test"
#define EIOT_IP_ADDRESS "192.168.1.5"
#define EIOT_PORT 80
#define EIOT_NODE "N13S0"
Connection
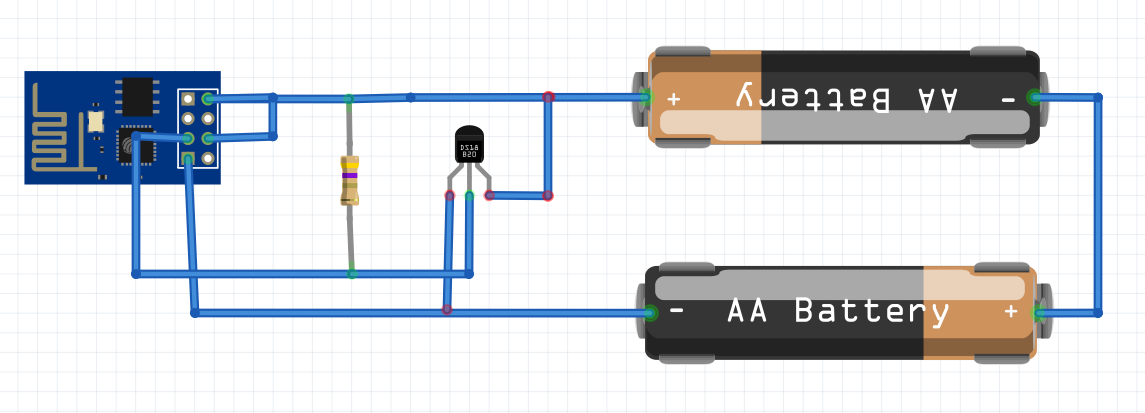
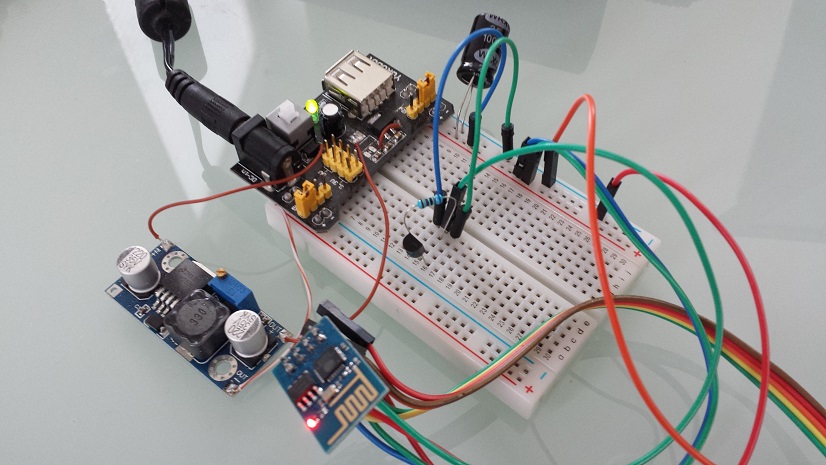
Connection diagram is very simple. Add DS18B20 to ESP8266 GPIO2 and one pull up resistor.


Check also EasyIoT Clud ESP8266 DS18B20 temperature sensor.
See more tutorials at http://iot-playground.com/build
Buying guide
To support this site and EasyIoT framework development please buy in our store.
Comments
Remplacer
avr/pgmspace.h par pgmspace.h>
Dans Base64.cpp
Remplacer
#include "Base64.h" par #include "Base641.h"
#include par #include
Dans DS18B20_temperature_sensor.ino
Base64_encode(unameenc, uname, strlen(uname));
par
base64_encode(unameenc, uname, strlen(uname));
Pour moi je compile après cela.
Quelqu'un peut il m'expliquer comment faire disparaître la bibliothèque Base64 (ou la remplacer par la bonne) que je ne trouve pas et qui crée le problème? Merci
(IDE Arduino 1.8.2 windows store1.8.2.0_x64)
#include par #include
/Api/EasyIoT/Control/Module/Virtual/N24S0/ControlL evel/SOMEVALUE returns "404 Not Found"
If I set the node to Temperature(AI) or Humidity(AI) the same url works.
ESP8266-DS18B20:56: error: 'base64_encode' was not declared in this scope
base64_encode(unameenc, uname, strlen(uname));
Please search forum for solution.
in Base64.cpp, #include
exists but I can't find avr/pgmspace.h
how can i solve this problem
help me
RSS feed for comments to this post