In this tutorial we will show how to build WiFi temperature sensor connected in EasyIoT Cloud. We will use ESP8266, DS18B20 and Arduino IDE.
THIS TUTORIAL IS OBSOLETE. Use: ESP8266 WiFi DS18B20 temperature sensor (EasyIoT Cloud REST API V1) and Email alarm
Contents
3. EasyIoT Cloud configuration
Introduction
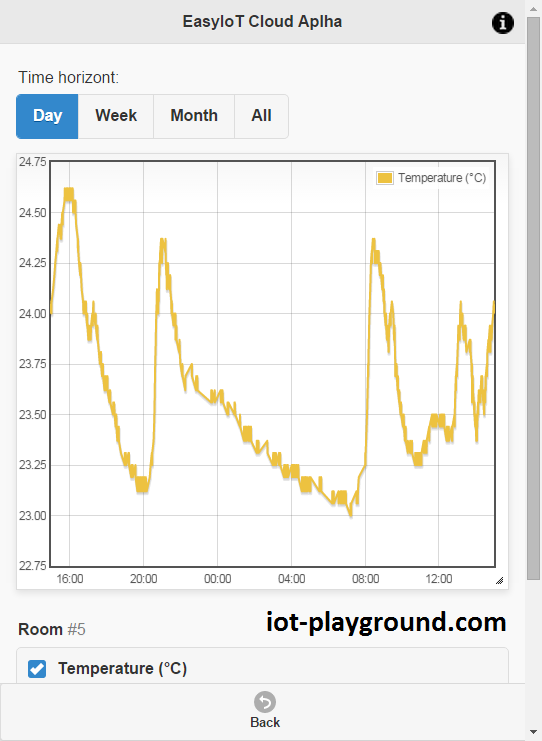
Historical temperature chart.
Materials
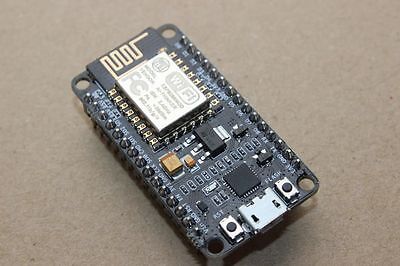
-ESP8266 WiFi module
| ESP8266 ESP-01 Serial WIFI Wireless Transceiver Module | |
$2.11  | |
$17.00  |
| ESP8266 ESP-03 Serial WIFI Wireless Transceiver Module | |
| $2.07 | |
| $2.15 |
| ESP8266 ESP-12 Serial WIFI Wireless Transceiver Module | |
| $2.06 | |
| $1.75 |
| ESP8266 ESP-05 Serial WIFI Wireless Transceiver Module | |
| $1.88 |
| ESP8266 ESP-07 Serial WIFI Wireless Transceiver Module | |
| $2.18 | |
| $1.88 |
| ESP8266 Lua Nodemcu WIFI Network Development Board | |
| $7.43 | |
| $2.65 |
-DS18B20 temperature sensor
| DS18B20 DALLAS Temperature Sensor | |
| $0.99 | |
| $0.79 |
| DS18B20 DALLAS Waterproof Temperature Sensor | |
| $1.4 | |
| $1.80 |
| DS18B20 Temperature Sensor module | |
| $1.89 |
-4,7K resistor
| 400X 0.25w 1/4w Metal Film Resistor Pack Kit 1% 20 Value Each 20 Pcs 10 ~ 1M ohm | |
| $1.88 | |
| $5.50 |
-3.3V power supply (battery or regulator)
| 5pcs 3.3V regulator module 800mA | |
| $1.12 | |
| $1.56 |
| 2xAA 3V Battery Holder Box Case Wire | |
| $0.99 | |
| $0.99 |
See buying guide at the end of tutorial.
EasyIoT Cloud configuration
Register to EasyIoT Cloud service. If you do not receive registration email check spam folder. If it's not there contact us and we will activate your account.
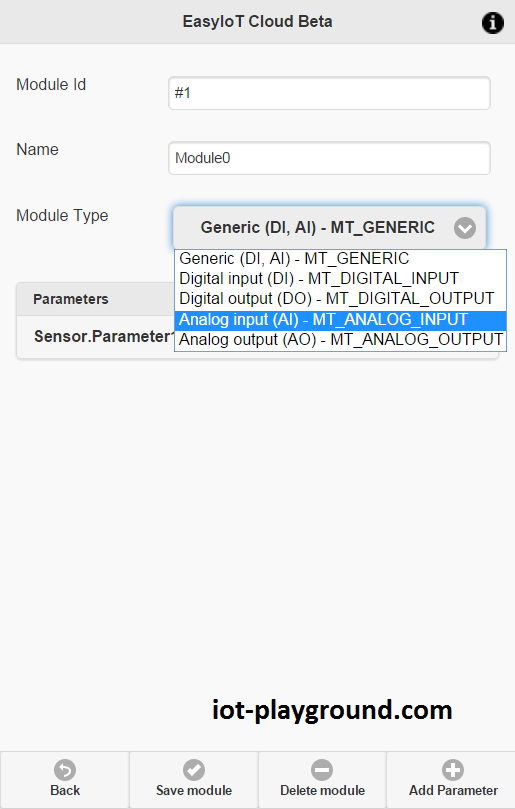
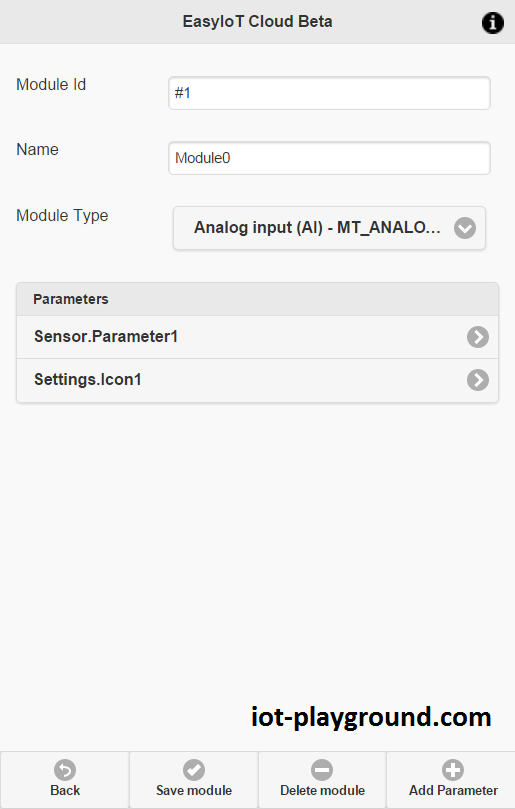
Then go to Configure->Modules->Add Module and select Analog Input module type.
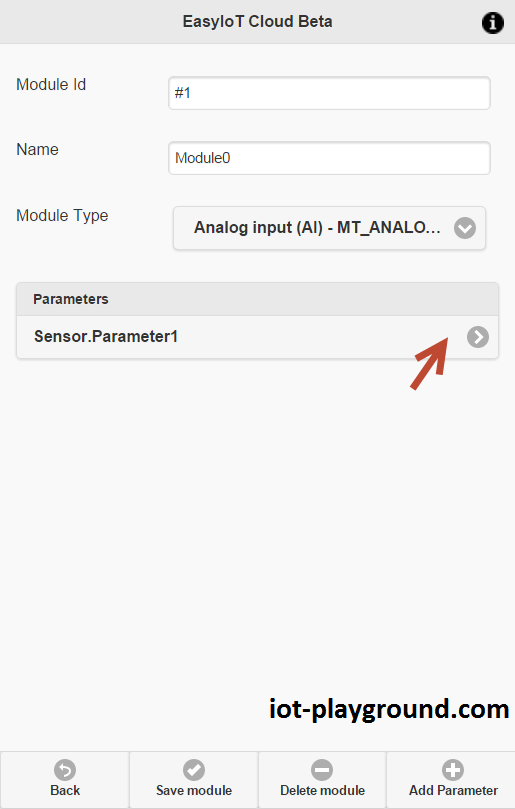
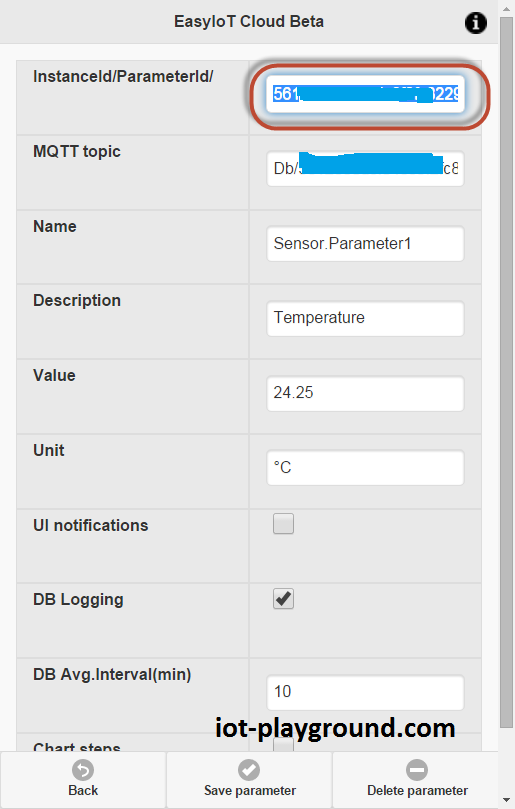
Click on Sensor.Parameter1.
For parameter set Description to Temperature, Unit to °C or °F, enable Log to database and set DB Avg.Interval to 10. DB logging means that we will log values in database, and historical values can be displayed in chart. DB Avg.Interval = 10 means that average value of parameter is inserted in database every 10 minutes. Then press Save Parameter button.
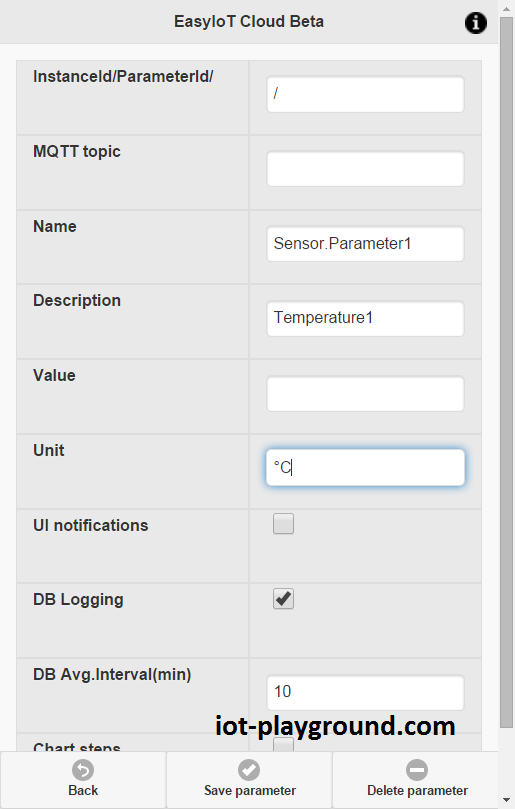
After you save parameter you will se InstanceId/ParameterId. Remember this value, because you will need it later in program.
Go back and press button Add parameter to add new parameter. Change Name to Settings.Icon1 and set Value to temperature.png. This settings will change default module icon. You can find all icons under Configure->Module Icons. After you set values press button Save Parameter.
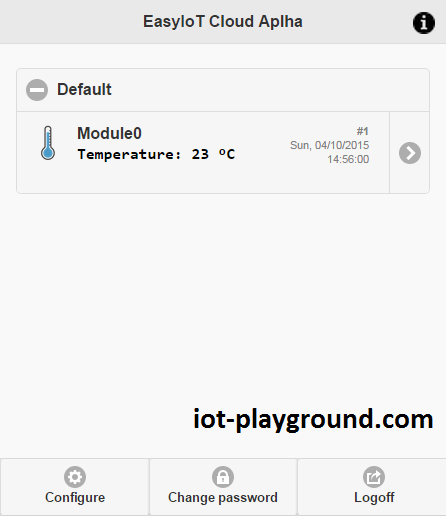
If you configure everything correctly you will see your newly added module on first page under Default group (go back on first page). You can change this group later if you like.
Program
Program is written in Arduino ESP8266 IDE. See Arduino ESP8266 IDE tutorial how to connect ESP8266 module to computer. Download program from our GitHub and change one line. Set Access Point username and password (AP_SSID , AP_PASSWORD) and instance id/parameter id - same parameter (EIOT_CLOUD_INSTANCE_PARAM_ID) you've copied before in EasyIoT Cloud configuration.
Instance id/parameter id:
//AP definitions - update this
#define AP_SSID "xxxxx"
#define AP_PASSWORD "xxxxx"
// EasyIoT Cloud definitions - change EIOT_CLOUD_INSTANCE_PARAM_ID
#define EIOT_CLOUD_INSTANCE_PARAM_ID "xxxxx"
In program we will send value to EasyIoT Cloud server. Correct URL to updating value is:
http://cloud.iot-playground.com:40404/RestApi/SetParameter/[instance id]/[parameter id]/[value]
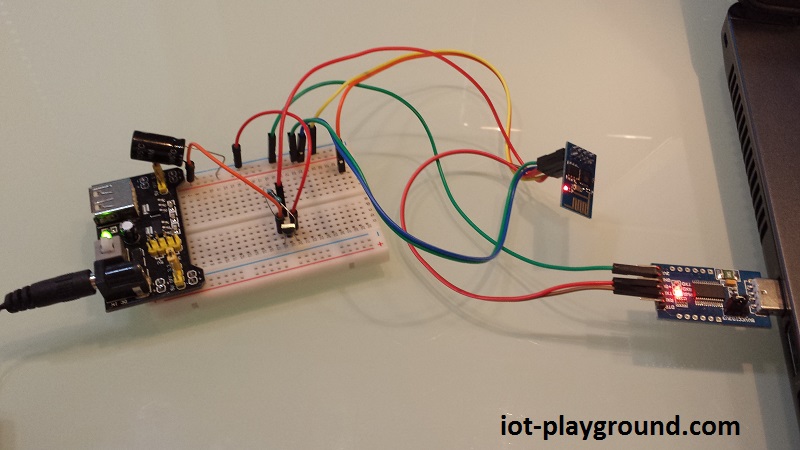
Hardware
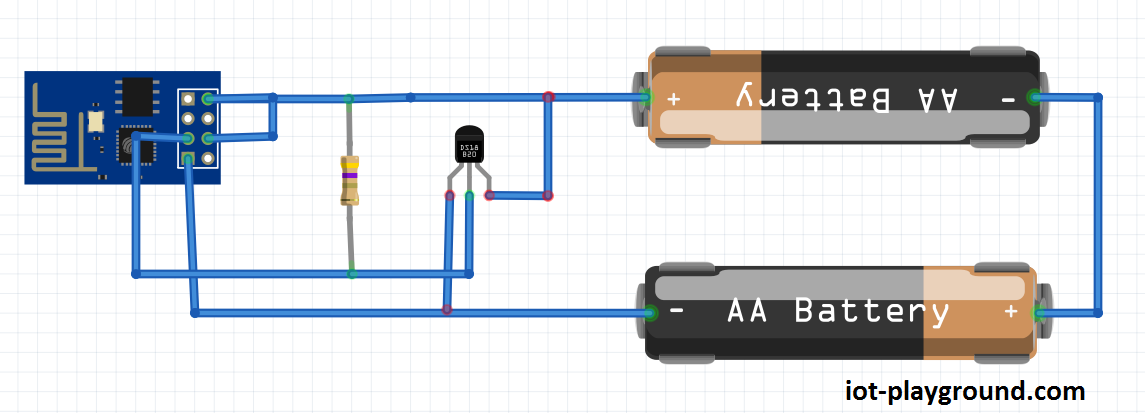
Connection diagram is shown below. Instead of ESP8266-01 you can use different type of ESP8266. Also you can use 3.3V power supply instead (AMS1117-3.3) of 2 AA batteries. If you connect everything correctly you can see temperature in EasyIoT cloud. Valuers are also visible in chart, because we enabled database logging.
See more tutorials at http://iot-playground.com/build
Buying guide
To support this site and EasyIoT framework development please buy in our store.


Comments
How did you change the module icon to a thermometer?
Oh, it is done via the Settings.Icon1 parameter!
Now problem with safari is fixed and you can try. Maybe you need to clear cache in web browser to load new app.
I guess not long, beacuse WiFi consumes a lot of power. You can put ESP in sleep mode - in this case you need also HW modifications.
I am using Version 9.0 (11601.1.56)
Thx, for report. I've tested with old version Safari 5.1.7 for Windows, since I do not own Mac, and it works ok.
Which version of Safari do you use?
RSS feed for comments to this post