- Posts: 55
- Thank you received: 6
Light Sensor | Esp8266 & BB05 with Arduino IDE
10 years 9 months ago - 10 years 9 months ago #1540
by lesjaw
Light Sensor | Esp8266 & BB05 with Arduino IDE was created by lesjaw
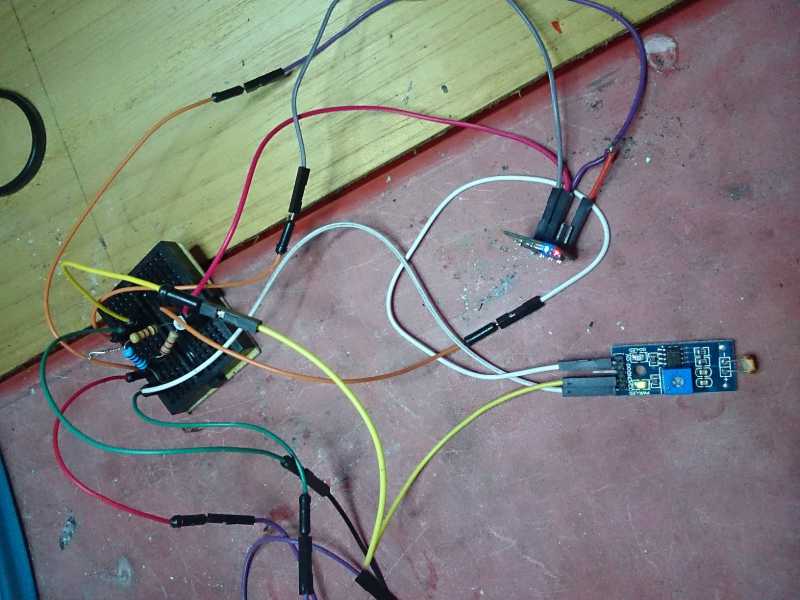
After succeed with DHT11 and Esp8266 using arduino ide, i made another progress for a Light sensor..
here is the sketch code
i'm using Photoresistor BB-05.. www.bukalapak.com/p/elektronik/lain-lain...-photoresistor-bb-05
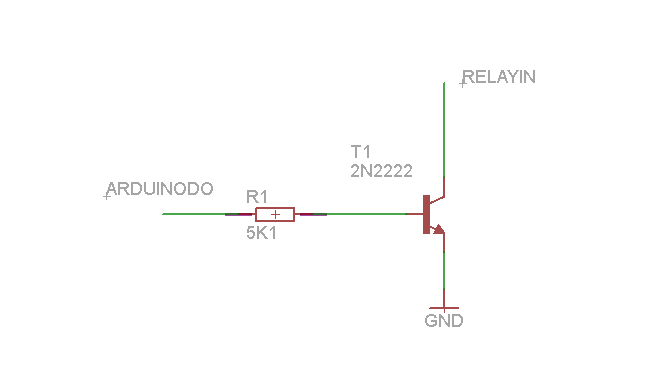
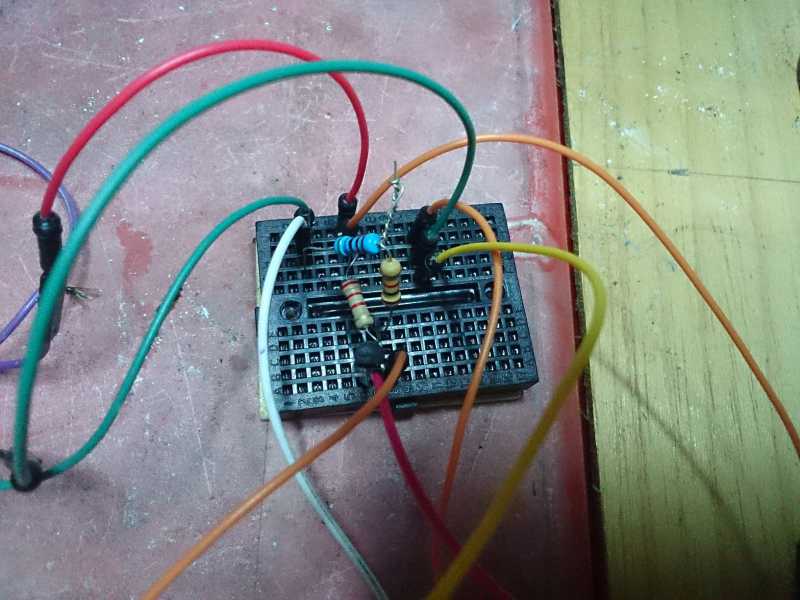
bb05 is 5v so you need shift level using 2n2222 or bc547.. see EasyIoT tutorial here for shift level
Perhaps You got to edit this value in to your own preference
perhaps somebody can make automation with dimmer light according to value of this sensor
here is the sketch code
/* Photocell simple testing sketch.

Connect one end of the photocell to 5V, the other end to Analog 0.
Then connect one end of a 10K resistor from Analog 0 to ground

For more information see http://learn.adafruit.com/photocells */
#include <ESP8266WiFi.h>
#include <DHT.h>
#include <Base64.h>

const char* ssid = "MiFi";
const char* password = "nexusdroit";
const char* host = "192.168.5.157";
const char* node = "N5S0";
const char* user = "admin";
const char* userpassword = "test";

int photocellPin = 2;     // the cell and 10K pulldown are connected to a0
int photocellReading;     // the analog reading from the analog resistor divider

#define USER_PWD_LEN 40
char unameenc[USER_PWD_LEN];

void setup(void) {
  // We'll send debugging information via the Serial monitor
  Serial.begin(9600);
  delay(10);
  // Connect to WiFi network
  Serial.println();
  Serial.print("Connecting to ");
  Serial.println(ssid);

  WiFi.begin(ssid, password);

  while (WiFi.status() != WL_CONNECTED) {
    delay(500);
    Serial.print(".");
  }
  Serial.println("");
  Serial.println("WiFi connected");

  Serial.println(WiFi.localIP());

  char uname[USER_PWD_LEN];
  String str = String(user)+":"+String(userpassword);
  str.toCharArray(uname, USER_PWD_LEN);
  memset(unameenc,0,sizeof(unameenc));
  base64_encode(unameenc, uname, strlen(uname));
}

void loop(void) {
  photocellReading = RCtime(photocellPin);

  Serial.print("Light reading = ");
  Serial.print(photocellReading);     // the raw analog reading

  Serial.print("Connecting to ");
  Serial.println(host);

  // Use WiFiClient class to create TCP connections
  WiFiClient client;
  const int httpPort = 80;
  if (!client.connect(host, httpPort)) {
    Serial.println("connection failed");
    return;
  }

 String light ="";
  // We'll have a few threshholds, qualitatively determined
  if (photocellReading < 100) {
    Serial.println(" - Dark");
    light = "Gelap";
  } else if (photocellReading < 200) {
    Serial.println(" - Dim");
    light = "Remang";
  } else if (photocellReading < 500) {
    Serial.println(" - Light");
    light = "Cukup";
  } else if (photocellReading < 800) {
    Serial.println(" - Bright");
    light = "Terang";
  } else {
    Serial.println(" - Very bright");
    light = "Terang";
  }
  delay(10);

  String url = "";
  url += "/Api/EasyIoT/Control/Module/Virtual/"+ String(node) + "/ControlLevel/"+String(light); // generate EasIoT server node URL

  Serial.print("POST data to URL: ");
  Serial.println(url);

  client.print(String("POST ") + url + " HTTP/1.1\r\n" +
               "Host: " + String(host) + "\r\n" +
               "Connection: close\r\n" +
               "Authorization: Basic " + unameenc + " \r\n" +
               "Content-Length: 0\r\n" +
               "\r\n");
  delay(9000);

  // Read all the lines of the reply from server and print them to Serial
    while(client.available()){
    String line = client.readStringUntil('\r');
    Serial.print(line);
  }
  Serial.println();
  Serial.println("closing connection");

  // Repeat every 5 minutes
}
  int RCtime(int RCpin) {
  int reading = 0;  // start with 0

  // set the pin to an output and pull to LOW (ground)
  pinMode(RCpin, OUTPUT);
  digitalWrite(RCpin, LOW);

  // Now set the pin to an input and...
  pinMode(RCpin, INPUT);
  while (digitalRead(RCpin) == LOW) { // count how long it takes to rise up to HIGH
    reading++;      // increment to keep track of time

    if (reading == 30000) {
      // if we got this far, the resistance is so high
      // its likely that nothing is connected!
      break;           // leave the loop
    }
  }
  // OK either we maxed out at 30000 or hopefully got a reading, return the count

  return reading;
}
i'm using Photoresistor BB-05.. www.bukalapak.com/p/elektronik/lain-lain...-photoresistor-bb-05
bb05 is 5v so you need shift level using 2n2222 or bc547.. see EasyIoT tutorial here for shift level
Perhaps You got to edit this value in to your own preference
if (photocellReading < 100) {
    Serial.println(" - Dark");
    light = "Gelap";
  } else if (photocellReading < 200) {
    Serial.println(" - Dim");
    light = "Remang";
  } else if (photocellReading < 500) {
    Serial.println(" - Light");
    light = "Cukup";
  } else if (photocellReading < 800) {
    Serial.println(" - Bright");
    light = "Terang";
  } else {
    Serial.println(" - Very bright");
    light = "Terang";
  }
perhaps somebody can make automation with dimmer light according to value of this sensor
Last edit: 10 years 9 months ago by lesjaw.
Please Log in or Create an account to join the conversation.
10 years 9 months ago #1542
by lesjaw
Replied by lesjaw on topic Light Sensor | Esp8266 & BB05 with Arduino IDE
Fixing the code..so it will send to server only when the value changes..
/* Photocell simple testing sketch.

Connect one end of the photocell to 5V, the other end to Analog 0.
Then connect one end of a 10K resistor from Analog 0 to ground

For more information see http://learn.adafruit.com/photocells */
#include <ESP8266WiFi.h>
#include <DHT.h>
#include <Base64.h>

// EasyIoT server definitions
#define ssid  "MiFi"
#define password  "nexusdroit"
#define host "192.168.5.157"
#define port 80
#define node "N5S0"
#define user "admin"
#define userpassword "test"

int photocellPin = 2;     // the cell and 10K pulldown are connected to a0
int photocellReading;     // the analog reading from the analog resistor divider
String oldLight;
String light;

#define USER_PWD_LEN 40
char unameenc[USER_PWD_LEN];

void setup(void) {
  // We'll send debugging information via the Serial monitor
  Serial.begin(9600);
  delay(10);
  // Connect to WiFi network
  Serial.println();
  Serial.print("Connecting to ");
  Serial.println(ssid);

  wifiConnect();

  char uname[USER_PWD_LEN];
  String str = String(user)+":"+String(userpassword);
  str.toCharArray(uname, USER_PWD_LEN);
  memset(unameenc,0,sizeof(unameenc));
  base64_encode(unameenc, uname, strlen(uname));

  oldLight = !light;
}

void loop() {
  photocellReading = RCtime(photocellPin);

  Serial.print("Light reading = ");
  Serial.print(photocellReading);     // the raw analog reading

     // We'll have a few threshholds, qualitatively determined
      if (photocellReading < 100) {
        Serial.println(" - Dark");
        light = "Gelap";
      } else if (photocellReading < 200) {
        Serial.println(" - Dim");
        light = "Remang";
      } else if (photocellReading < 700) {
        Serial.println(" - Light");
        light = "Cukup";
      } else if (photocellReading < 1000) {
        Serial.println(" - Bright");
        light = "Terang";
      } else {
        Serial.println(" - Very bright");
        light = "Terang";
      }
      delay(1000);

      if (light != oldLight){
        sendInputState(light);
        oldLight = light;
      }
}

void wifiConnect(){
      Serial.print("Connecting to AP");
      WiFi.begin(ssid, password);
      while (WiFi.status() != WL_CONNECTED) {
      delay(100);
      Serial.print(".");
}

Serial.println("");
Serial.println("WiFi connected");
}

void sendInputState(String light){
  // Use WiFiClient class to create TCP connections
  WiFiClient client;
  while(!client.connect(host, port)) {
    Serial.println("connection failed");
    wifiConnect();
  }

  String url = "";
  url += "/Api/EasyIoT/Control/Module/Virtual/"+ String(node) + "/ControlLevel/"+String(light); // generate EasIoT server node URL

  Serial.print("POST data to URL: ");
  Serial.println(url);

  client.print(String("POST ") + url + " HTTP/1.1\r\n" +
               "Host: " + String(host) + "\r\n" +
               "Connection: close\r\n" +
               "Authorization: Basic " + unameenc + " \r\n" +
               "Content-Length: 0\r\n" +
               "\r\n");
  delay(100);

  // Read all the lines of the reply from server and print them to Serial
    while(client.available()){
    String line = client.readStringUntil('\r');
    Serial.print(line);
  }
  Serial.println();
  Serial.println("closing connection");

  // Repeat every 5 minutes
}
  int RCtime(int RCpin) {
  int reading = 0;  // start with 0

  // set the pin to an output and pull to LOW (ground)
  pinMode(RCpin, OUTPUT);
  digitalWrite(RCpin, LOW);

  // Now set the pin to an input and...
  pinMode(RCpin, INPUT);
  while (digitalRead(RCpin) == LOW) { // count how long it takes to rise up to HIGH
    reading++;      // increment to keep track of time

    if (reading == 30000) {
      // if we got this far, the resistance is so high
      // its likely that nothing is connected!
      break;           // leave the loop
    }
  }
  // OK either we maxed out at 30000 or hopefully got a reading, return the count

  return reading;
}
Please Log in or Create an account to join the conversation.
10 years 9 months ago #1577
by EasyIoT
Replied by EasyIoT on topic Light Sensor | Esp8266 & BB05 with Arduino IDE
Nice. I like your idea to report light level as text.
Please Log in or Create an account to join the conversation.
Time to create page: 0.349 seconds
Forum latest
- No posts to display.


