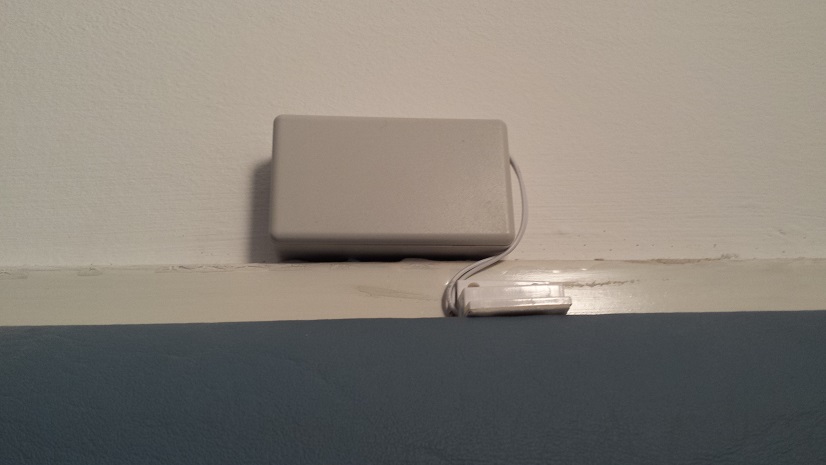
In this tutorial we will show how to build low power NRF24L01 Arduino door/window sensor.

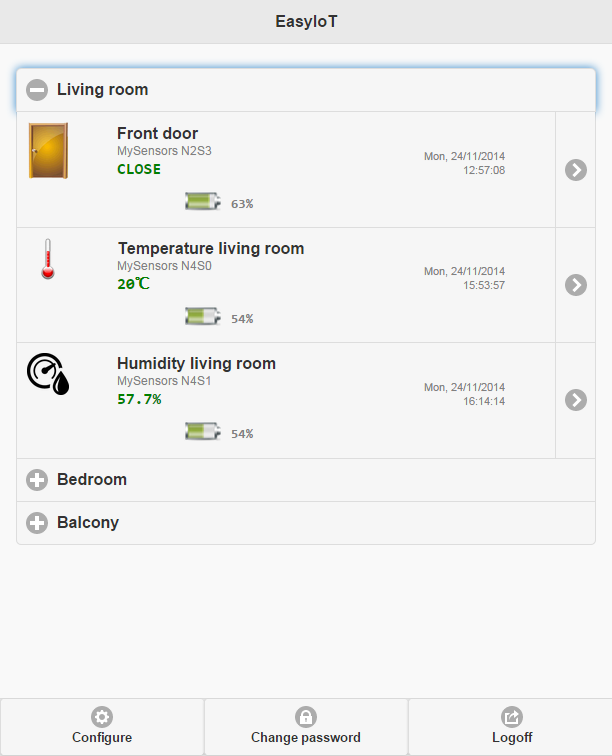
Sensor has low power consumption. 2AA batteries could last at least between 5-10 years. In my test case battery drops for 1% in 43 days. In theory it means 100% in 4300 days, which is  about 12 years. Power consumption of this sensor is so low that I'm using wasted batteries from electronic toys and sensor still work. Sensor reports battery voltage back to EasyIoT Server. 


Low power door/window sensor

Low power door/window sensor


Door/window sensor in EasyIoT Server
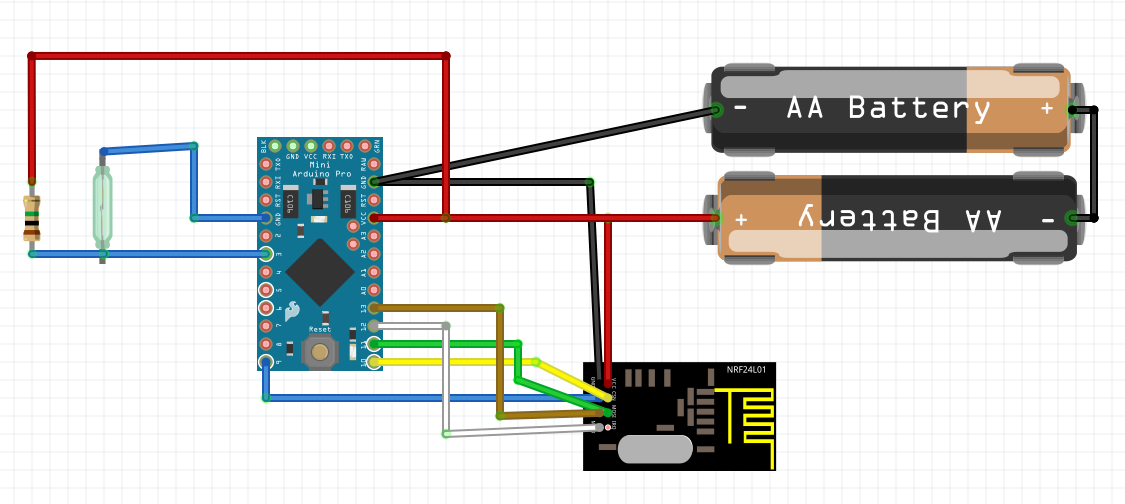
Door/window sensor in EasyIoT server


Components:

  • Low power Arduino (arduino low power sensor)
  • NRF24L01
  • 2 AA battery holder
  • 1M resistor
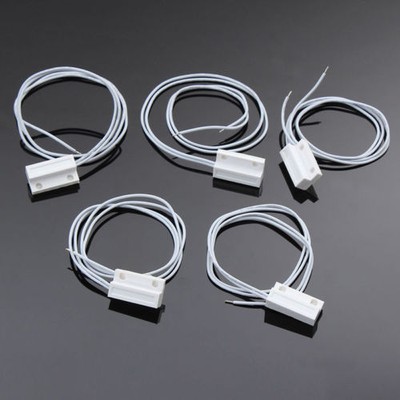
  • reed magnetic window/door switch

See buying guide at the end of tutorial.

Connection diagram:

Low power door/window sensor


Download on Github


Check also EasyIoT Cloud ESP8266 door/window sensor.

See more tutorials at ​http://iot-playground.com/build​ 


Buying guide

To support this site and EasyIoT framework development please buy in our store.

3.3V 8Mhz Arduino Pro Mini

3.3V Arduino version. No need for shift leveler when using ESP8266.

2PCS NRF24L01+ 2.4GHz Wireless Transceiver Module

The nRF24L01 is a highly integrated, ultra low power (ULP) 2Mbps RF transceiver IC for the 2.4GHz ISM (Industrial, Scientific and Medical) band.

10PCS NRF24L01+ 2.4GHz Wireless Transceiver Module

The nRF24L01 is a highly integrated, ultra low power (ULP) 2Mbps RF transceiver IC for the 2.4GHz ISM (Industrial, Scientific and Medical) band.

5pcs New Plastic Project Box Electronic Case DIY 70 x 40.5 x 23mm

10pcs New Plastic Project Box Electronic Case DIY 70 x 40.5 x 23mm

100pcs 1/8w Watt 0.125W 1 M Ohm Metal Film R Resistor

10 pcs MC-38 Wired Door Window Sensor Magnetic Switch

2xAA 3V Battery Holder Box Case Wire

This 2xAA battery holder puts a nice finishing touch on your battery powered project.

10Pcs 2xAA Plastic Battery Storage Case Box Holder

This 2xAA battery holder puts a nice finishing touch on your battery powered project.


Comments   

#16 Dan 2017-04-22 03:17
Is there a specific guide for the software configuration? Could this work for a EasyIoT server running on windows?
+1 #15 Tom Martin 2016-01-17 09:19
Will this work with a Uno and RP2 for testing purposes?
#14 Maciej Kulawik 2015-12-04 20:13
Hi.
Power consumption really amazing.
Don't you call gw.powerDown(); after sendBaterryLevel command?
And is it necessary to power radio down after sending value, and then power it up before sending battery level?
#13 Cedric 2015-11-19 05:54
How did you manage to get everything into that little box? Could you post a pic of the insides maybe? Seems like the batter case takes up 99% of the space inside the box.
#12 Christopher Lawson 2015-11-07 15:57
Quoting Javier Bau li:
Quoting Christopher Lawson:
Yes you will need a raspberry pi connected to the NRF24L01.
...
-Chris

Quoting Javier Bau li:
HI

one question for all the tutorials with (MySensors) NRF24L01 you have to run the server on a raspberry and you must have conected a NRF24L01 to raspberry pi?

I have to configure something on raspberry pi or only put the image server?

Thanks for your answer

I have some nrlf and I want to add one at my raspberry, I will put a ams1117 and a capacitor to 3.3 but the other pins how are conected to the raspberry?


Javier,

I used the instructions from this page //iot-playground.com/2-uncategorised/3-easyiot-server-installation

-Chris
#11 Javier Bau li 2015-11-06 22:07
Quoting Christopher Lawson:
Yes you will need a raspberry pi connected to the NRF24L01. There is an adapter board you can pick up on ebay, just take a look at iot-playground.com/2-uncategorised/65-easyiot-server-v0-9-released-rpi-nrf24l01-board

All I did was put the image on it and adjust the sensor channel to match what I selected in my sensor header file.

-Chris

Quoting Javier Bau li:
HI

one question for all the tutorials with (MySensors) NRF24L01 you have to run the server on a raspberry and you must have conected a NRF24L01 to raspberry pi?

I have to configure something on raspberry pi or only put the image server?

Thanks for your answer

I have some nrlf and I want to add one at my raspberry, I will put a ams1117 and a capacitor to 3.3 but the other pins how are conected to the raspberry?
#10 Christopher Lawson 2015-11-05 05:55
Yes you will need a raspberry pi connected to the NRF24L01. There is an adapter board you can pick up on ebay, just take a look at iot-playground.com/2-uncategorised/65-easyiot-server-v0-9-released-rpi-nrf24l01-board

All I did was put the image on it and adjust the sensor channel to match what I selected in my sensor header file.

-Chris

Quoting Javier Bau li:
HI

one question for all the tutorials with (MySensors) NRF24L01 you have to run the server on a raspberry and you must have conected a NRF24L01 to raspberry pi?

I have to configure something on raspberry pi or only put the image server?
#9 Javier Bau li 2015-10-12 13:31
HI

one question for all the tutorials with (MySensors) NRF24L01 you have to run the server on a raspberry and you must have conected a NRF24L01 to raspberry pi?

I have to configure something on raspberry pi or only put the image server?
#8 Super User 2015-06-18 23:23
Quoting Allan Madsen:
Hmm again a tutorial there dosent work.


Stop spamming this site with comments like this. If you have problem join forum and ask questions with detailed questions and your configuration description. First search forum if question was asked before.
-2 #7 Allan Madsen 2015-06-18 23:02
Hmm again a tutorial there dosent work.

You have no rights to post comments

Forum latest

  • No posts to display.