In this tutorial we will show how to build WiFi door/window sensor connected to EasyIoT Cloud. We will use ESP8266, magnetic switch and Arduino IDE.
This tutorial is obsolete. Use updated version ESP8266 WiFi door/window sensor (EasyIoT Cloud REST API V1.0).
Contents
3. EasyIoT Cloud configuration
Introduction
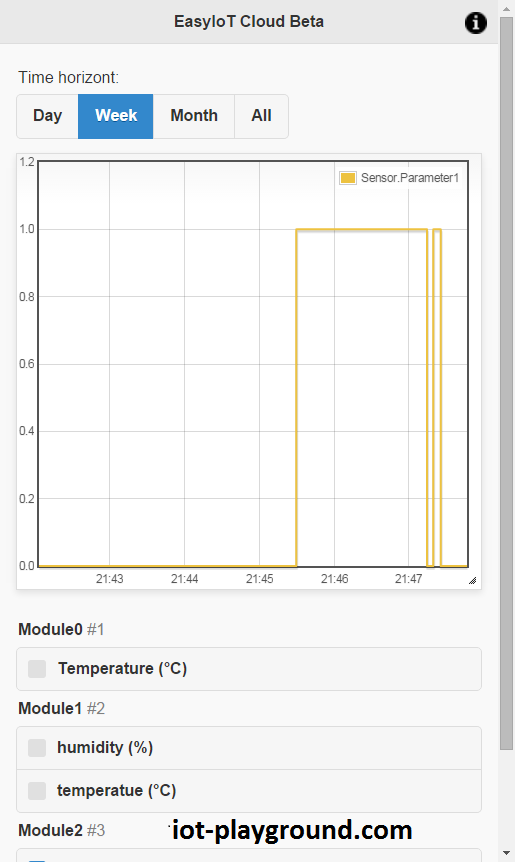
Door/window sensor historical chart.
Materials
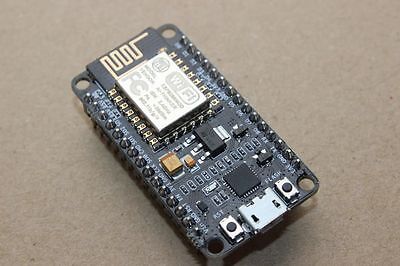
-ESP8266 WiFi module
| ESP8266 ESP-01 Serial WIFI Wireless Transceiver Module | |
$2.11  |
| ESP8266 ESP-03 Serial WIFI Wireless Transceiver Module | |
| $2.07 |
| ESP8266 ESP-12 Serial WIFI Wireless Transceiver Module | |
| $2.06 |
| ESP8266 ESP-05 Serial WIFI Wireless Transceiver Module | |
| $1.88 |
| ESP8266 ESP-07 Serial WIFI Wireless Transceiver Module | |
| $2.18 |
| ESP8266 Lua Nodemcu WIFI Network Development Board | |
| $7.43 |
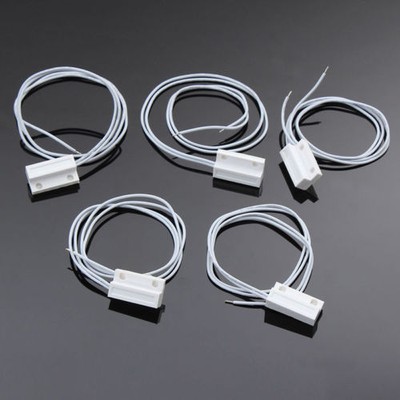
-Door/window magnetic switch
| 10 pcs MC-38 Wired Door Window Sensor Magnetic Switch | |
| $3.19 |
-3.3V power supply (battery or regulator)
| 5pcs 3.3V regulator module 800mA | |
| $1.12 |
| 2xAA 3V Battery Holder Box Case Wire | |
| $0.99 |
See buying guide at the end of tutorial for details.
EasyIoT Cloud configuration
Register to EasyIoT Cloud service. If you do not receive registration email check spam folder. If it's not there contact us and we will activate your account.
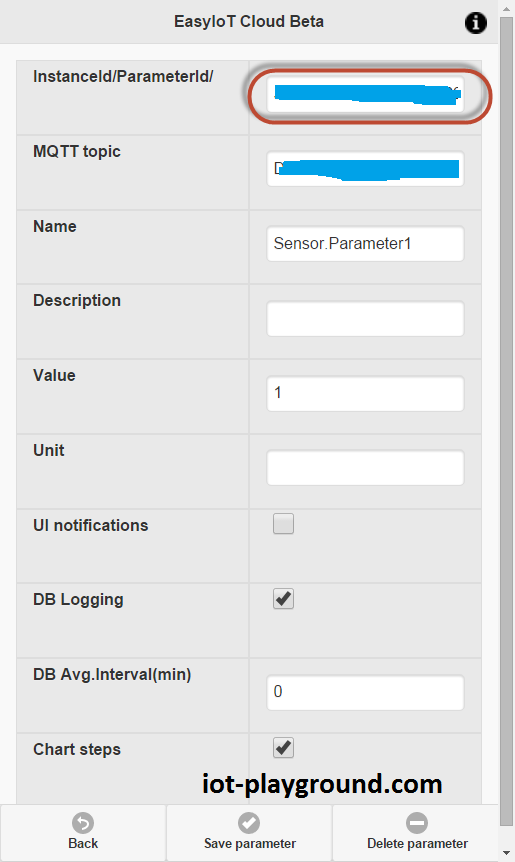
Then go to Configure->Modules->Add Module and set Digital Input (DI). Next Click Senosr.Parameter1.

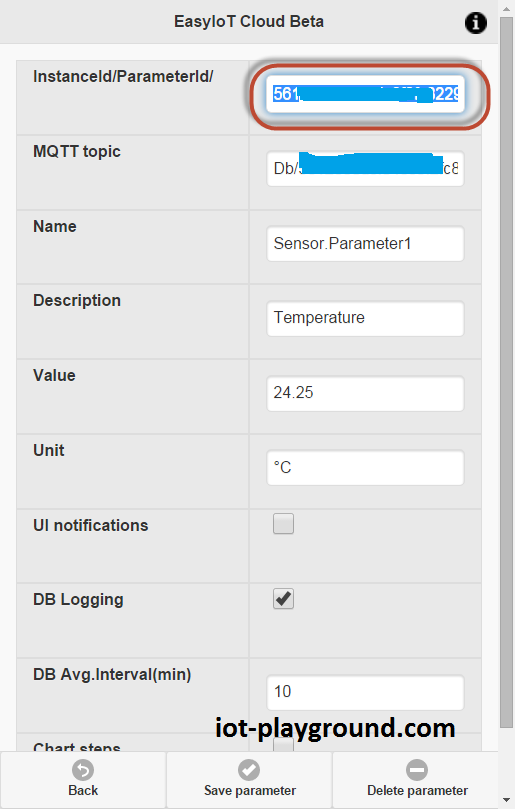
For first parameter set: Name: Sensor.Parameter1, DbLogging - checked and Chart Steps - checked.
DB logging means that we will log values in database, and historical values can be displayed in chart, Chart Steps means that chart values are not interpolated.

Press Save Parameter button. After save you will see InstanceId/ParameterId - remember this value, because you will need it later in program.
Go back to module configuration.
Next we will change module icons. Available icons are visible under Configuration->Module Icons. You can also upload your own icon.
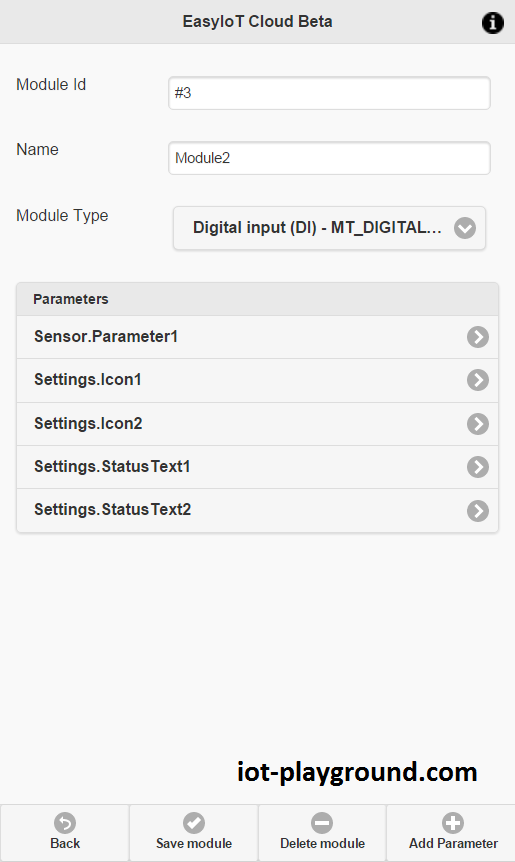
Add two parameters (button Add Parameter) and set first parameter name: Settings.Icon1 and set Value to door_1.png. For second parameter set Name: Settings.Icon2 and Value: door_2.png.
We will also change module text. Add two parameters and set first name: Settings.StatusText1 to: Open and for second parameter Settings.StatusText2 and Value: Close.
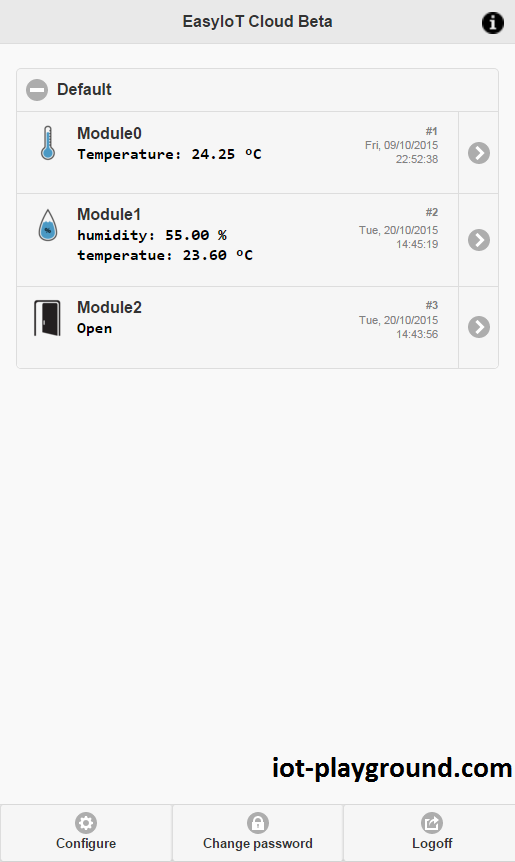
Now you should see 5 parameters under module configuration:
Program
Program is written in Arduino ESP8266 IDE. See Arduino ESP8266 IDE tutorial how to connect ESP8266 module to computer to upload program. Program is available at our GitHub. You will also need EIoTCloudRestApi library. In library set access point username and password.
In program change EIOT_CLOUD_INSTANCE_PARAM_ID
// EasyIoT Cloud definitions - change EIOT_CLOUD_INSTANCE_PARAM_ID
#define EIOT_CLOUD_INSTANCE_PARAM_ID "xxxx"
InstanceId/ParameterId in parameter configuration.
If you are change GPIO pin on ESP8266 then aslo change GPIO pin in program.
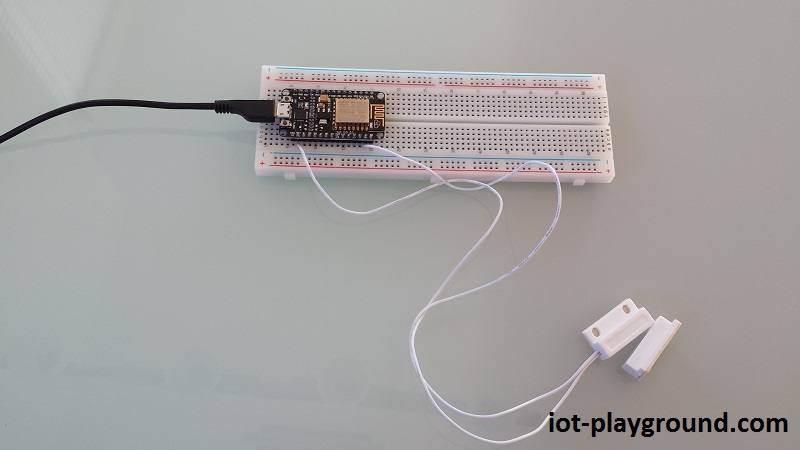
Hardware
In our case we use NodeMcu ESP8266, but you can use any other ESP8266 with FDTI programmer. For power supply you can use 2 AA batteries or 3.3V regulator (see buying guide).
One wire of magnetic switch connect to GPIO5 and other to ground and that's it.
See more tutorials at http://iot-playground.com/build
This tutorial is obsolete. Use updated version ESP8266 WiFi door/window sensor (EasyIoT Cloud REST API V1.0).
Buying guide
To support this site and EasyIoT framework development please buy in our store.


Comments
myMqtt.subscribe("/"+String(storage.moduleId)+ "/Settings.Icon2/NewParameter");
valueStr = String(door_1.png);
topic = "/"+String(storage.moduleId)+ "/Settings.Icon1";
result = myMqtt.publish(topic, valueStr);
If i fix them manualy and i create MT_DIGITAL_INPUT the Sensor.Parameter1 is not changing his value when i push the button.. can someone help me ?
Is there a way of using this with easyiot server rather than on the cloud? (Same with other guides)?
RSS feed for comments to this post