In this tutorial we will show how to build Plug and Play WiFi temperature sensor connected in EasyIoT Cloud. We will use ESP8266, DS18B20 and Arduino IDE. We will also add Email alarm notification if temperature is to high.
Contents
5. EasyIoT Cloud configuration
Introduction
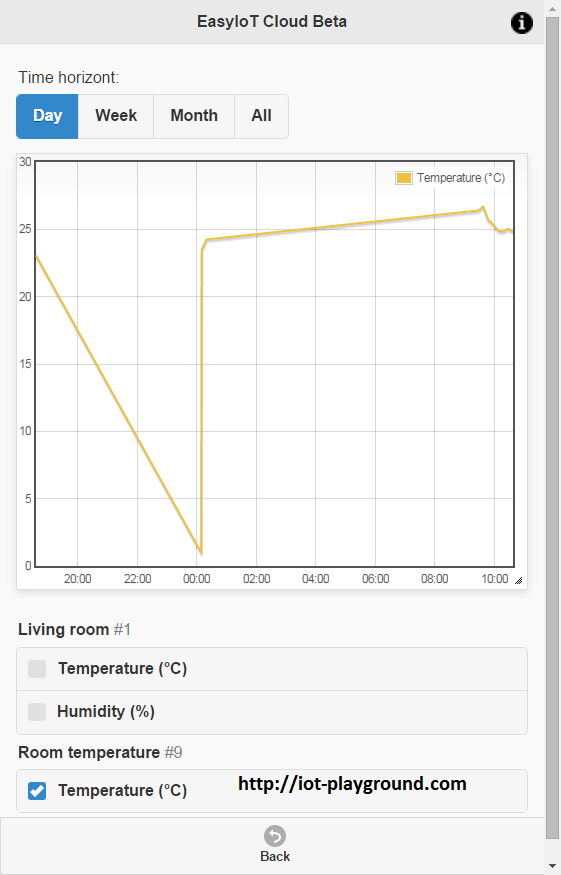
Historical temperature chart.
Materials
-ESP8266 WiFi module
| ESP8266 ESP-01 Serial WIFI Wireless Transceiver Module | |
$2.11  |
| ESP8266 ESP-03 Serial WIFI Wireless Transceiver Module | |
| $2.07 |
| ESP8266 ESP-12 Serial WIFI Wireless Transceiver Module | |
| $2.06 |
| ESP8266 ESP-05 Serial WIFI Wireless Transceiver Module | |
| $1.88 |
| ESP8266 ESP-07 Serial WIFI Wireless Transceiver Module | |
| $2.18 |
| ESP8266 Lua Nodemcu WIFI Network Development Board | |
| $7.43 |
-DS18B20 temperature sensor
| DS18B20 DALLAS Temperature Sensor | |
| $0.99 |
| DS18B20 DALLAS Waterproof Temperature Sensor | |
| $1.4 |
| DS18B20 Temperature Sensor module | |
| $1.89 |
-4,7K resistor
| 400X 0.25w 1/4w Metal Film Resistor Pack Kit 1% 20 Value Each 20 Pcs 10 ~ 1M ohm | |
| $1.88 |
-3.3V power supply (battery or regulator)
| 5pcs 3.3V regulator module 800mA | |
| $1.12 |
| 2xAA 3V Battery Holder Box Case Wire | |
| $0.99 |
See buying guide at the end of tutorial.
Hardware
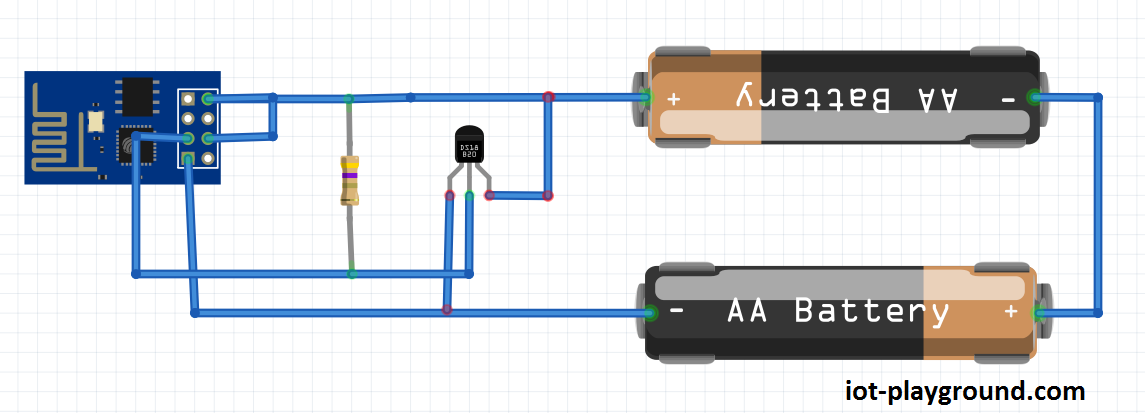
Connection diagram is shown below. Instead of ESP8266-01 you can use different type of ESP8266. Also you can use 3.3V power supply instead (AMS1117-3.3) of 2 AA batteries.
Program
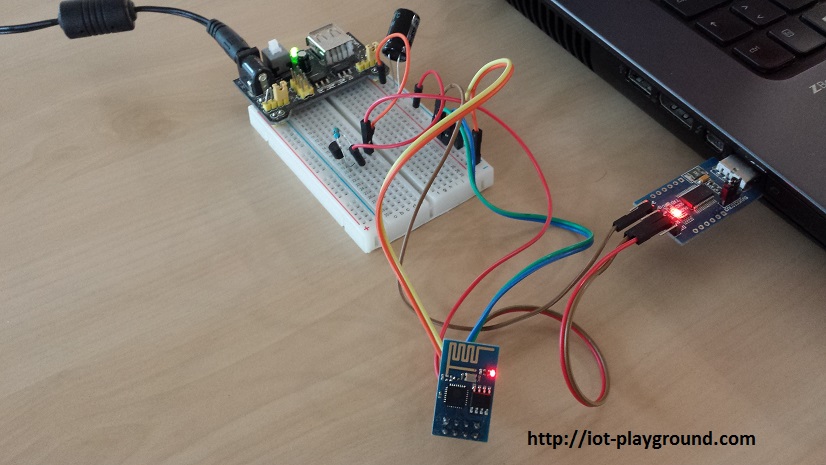
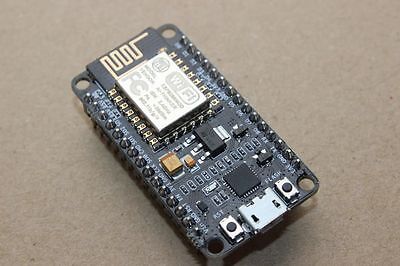
Program is written in Arduino ESP8266 IDE. See Arduino ESP8266 IDE tutorial how to connect ESP8266 module to computer. If you are not experienced it's recommended to use ESP8266 Node MCU board - just connect it to computer USB port.
Download program from our GitHub. Also download EIoTCloudRestApiV1.0 library and add it to your library folder in Arduino IDE. Dallas temperature lib can be downloaded here.
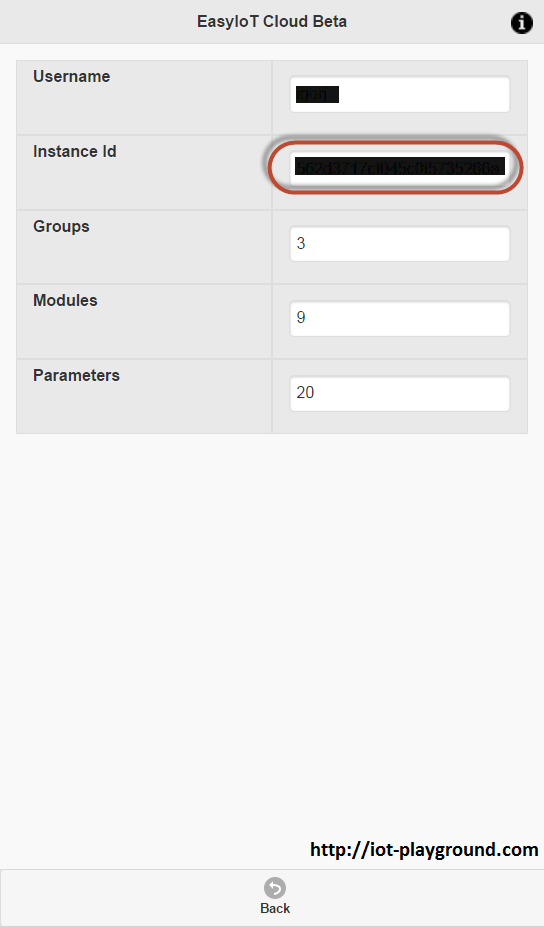
In program you need to change only three lines: set access point name, access point password and your instance ID. To get instance ID you need to register to EasyIoT Cloud service. Instance Id can be found under Configure->User Info->Instance Id
// change those lines
#define AP_USERNAME "xxxx"
#define AP_PASSWORD "xxxx"
#define INSTANCE_ID "xxxx"
Program reads configuration from EEPROM. If module ID is 0 then it know that it is not configured in Cloud. It ads new module, name it and add appropriate parameters and parameter settings (look in program comments for details). Newly added module ID is stored in ESP8266 EEPROM. Next time when we switch on our temperature sensor it reads module ID from EEPROM and no Cloud configuration is not needed. Temperature sensor is automatically added to EasyIoT Cloud and no configuration is needed. You can see new module in EasyIoT Cloud or native mobile application.

EasyIoT Cloud configuration
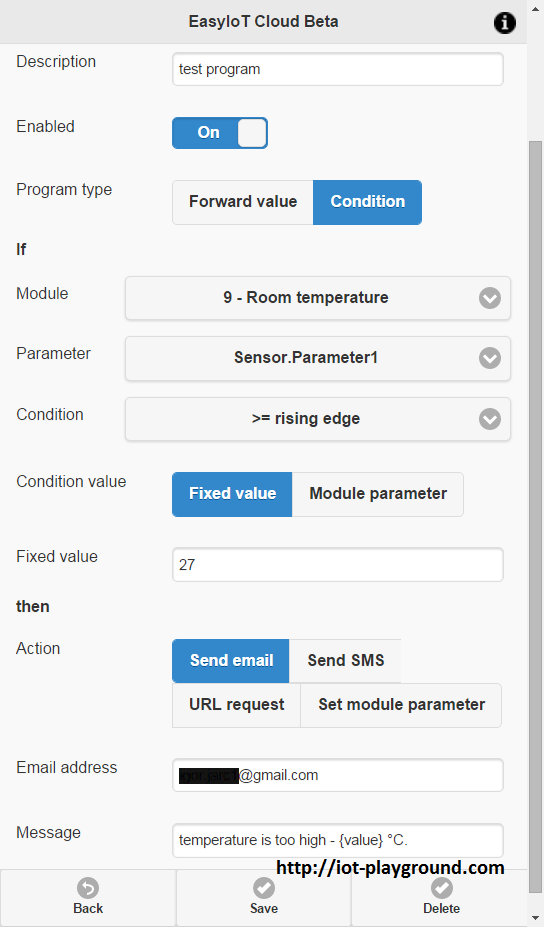
To use temperature sensor you do not need to configure anything, because sensor is Plug and Play. If you want to set temperature email alarm configure following automation program. Go to Configure->Automation and press Add automation button.
In automation program configure following:
Enable program, select program type "Condition". In If condition select your newly added sensor module and Sensor.Parameter1 and set condition to ">= rising edge". Rising edge means that you will be notified only once when temperature raise at certain value. In condition value select "Fixed value" and set fixed value (in our case fixed value is 27). Then set action "Send email" and set email address and message. If you want to see value in message use {value}. At least save program with button save.
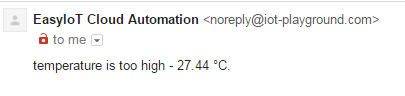
In this example if sensor for 9 - room temperature sends temperature equal or greater than 27 we will be notified once (on rising edge) to email address with message like this:
See more tutorials at http://iot-playground.com/build
Buying guide
To support this site and EasyIoT framework development please buy in our store.


Comments
No module is added to my dashboard.. ;/
Is there a way to get the data back from the databse to the esp8266?
RSS feed for comments to this post