In this tutorial we will show how to make Wifi temperature and humidity sensor with Arduino, ESP8266 WiFi module and DHT22. Data will be sent to EasyIoT server.
Materials:
See buying guide at the end of tutorial.
-ESP8266 module
| ESP8266 ESP-01 Serial WIFI Wireless Transceiver Module | |
$2.11  |
| ESP8266 ESP-03 Serial WIFI Wireless Transceiver Module | |
| $2.07 |
| ESP8266 ESP-12 Serial WIFI Wireless Transceiver Module | |
| $2.06 |
| ESP8266 ESP-05 Serial WIFI Wireless Transceiver Module | |
| $1.88 |
| ESP8266 ESP-07 Serial WIFI Wireless Transceiver Module | |
| $2.18 |
-Arduino Pro Mini 8Mzh 3.3V
| 3.3V 8Mhz Arduino Pro Mini | |
| $2.05 |
-5V power supplay
| 5V 2A Charger Micro USB | |
| $2.43 |
-3.3V power supplay (see dataheet)
| 10Pcs AMS1117-3.3 LM1117 3.3V 1A SOT-223 Voltage Regulator | |
| $0.99 |
-DHT22 temperature and humidity sensor
| DHT22 Digital Temperature And Humidity Sensor | |
| $2.67 |
-EasyIoT server on Raspberry Pi (see download page)
| RASPBERRY PI 3 - Model B. 1GB RAM | |
| $41.99 |
-WiFi network (WiFi router)
Create Arduino sensor
First connect Arduino pro mini 8Mhz 3.3V to power supply and ESP8266 module. See ESP8266 WiFi module Arduino connection for details.
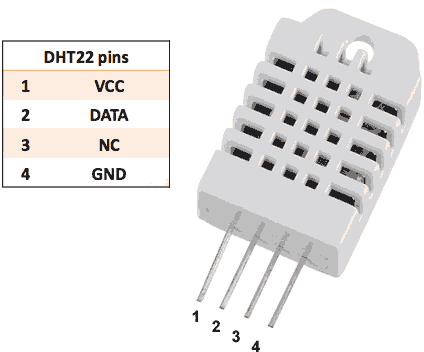
Then connect DHT22 and Arduino. Connect DHT22 VCC to 3.3V power supplay and GND to GND power supplay. Conenct DHT22 pin 2 (data) to pin 2 on Arduino.
Next upload program to Arduino. Program is available on ESP8266 Temperature and humidity sensor. Make sure to correct your access point username and password and EasyIoT server IP in Esp8266EasyIoTConfig.h.
Add new sensor to EasyIoT server
Now we need to add new sensor to EasyIoT server. In web browser enter IP address of EasyIoT server. Go to Configure->Drivers->ESP8266 EasyIoT driver and enable driver.
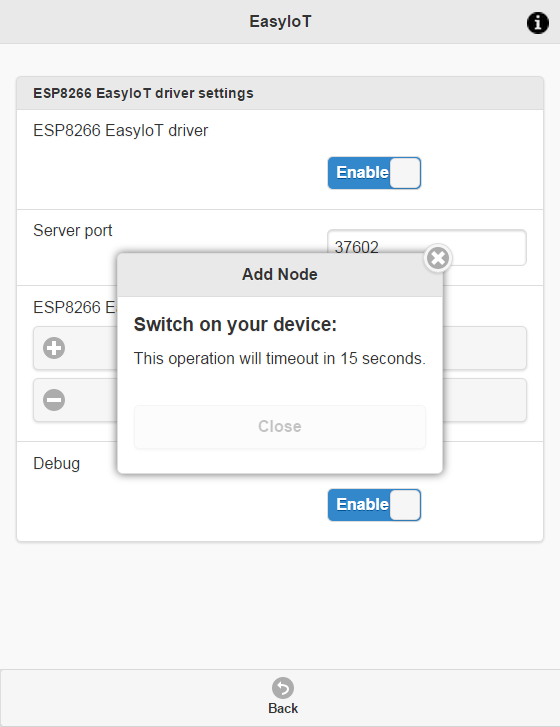
Click Add Node button and switch on new sensor.

Wait couple of seconds.
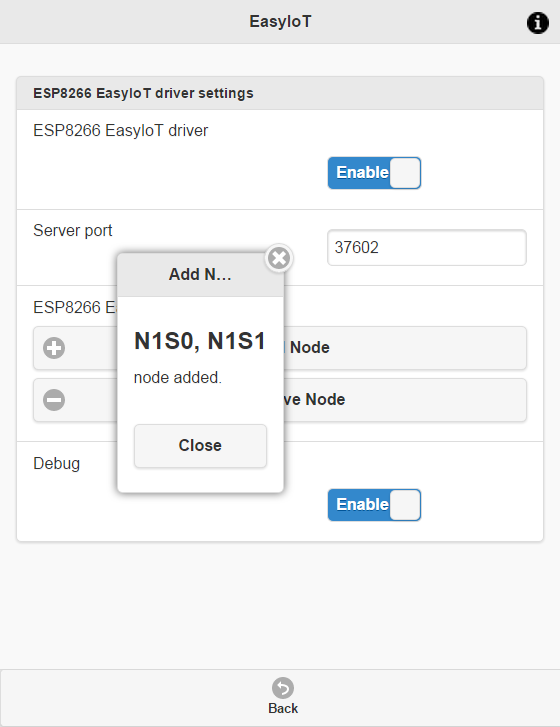
If everything is correct you should see message like this (no timeout message). This means that two nodes added to EasyIoT server (nodes for temperature and one for humidity).
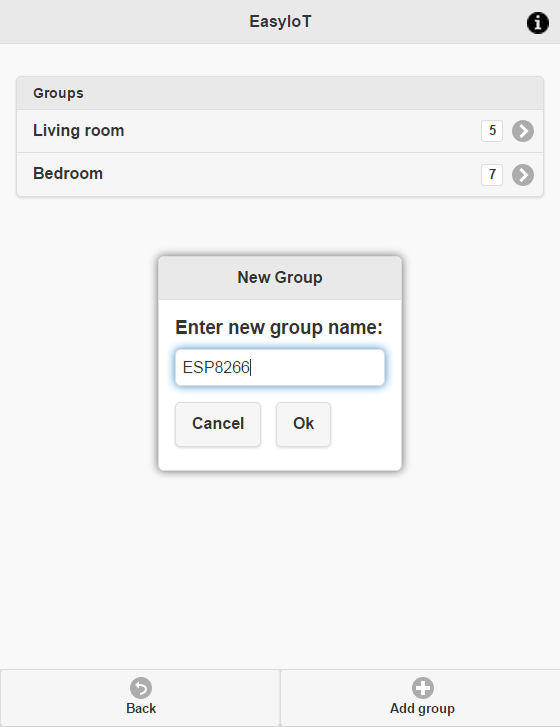
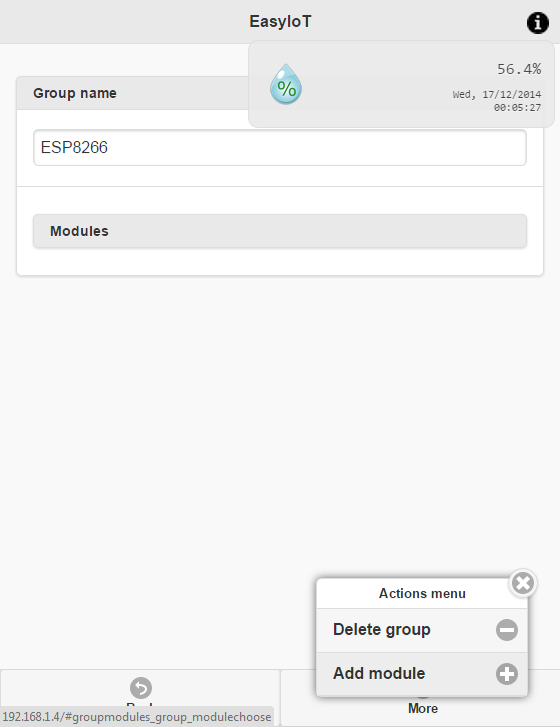
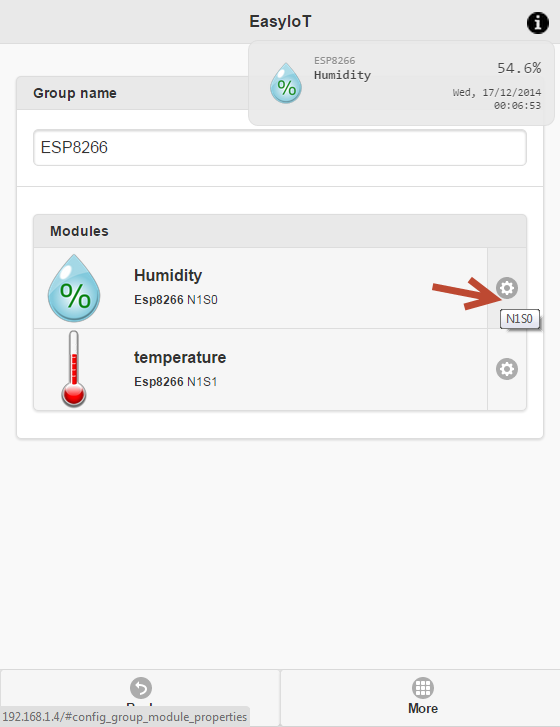
Go back to Groups and modules and add new group.
Add new modules.
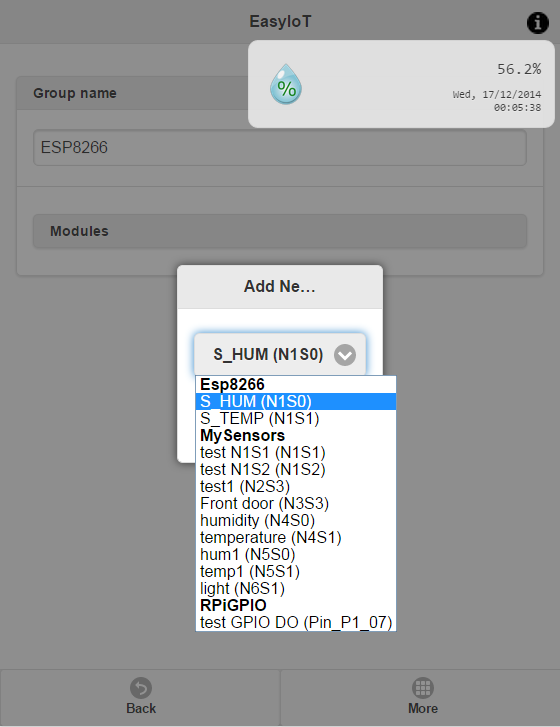
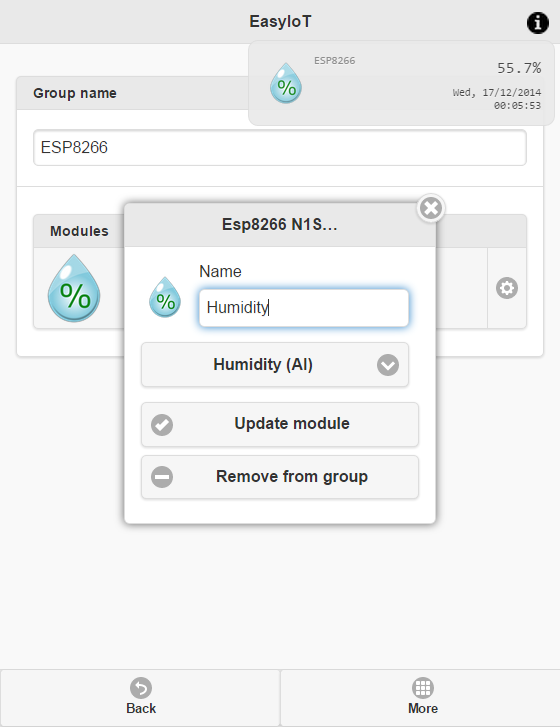
Add temperature module.

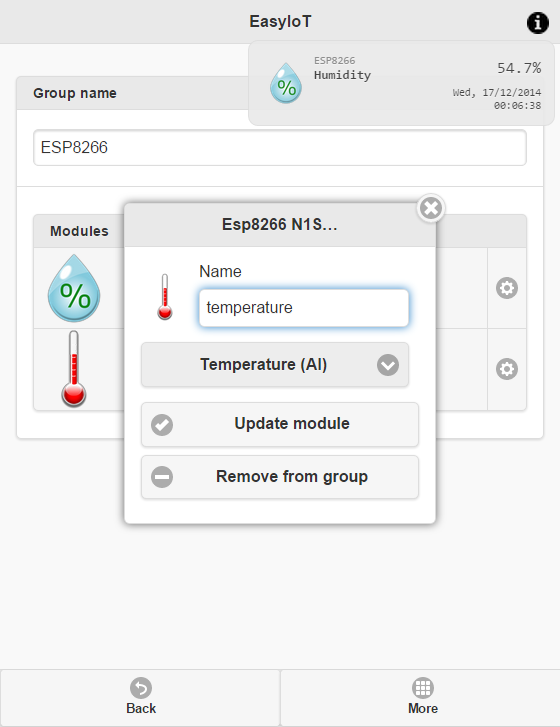
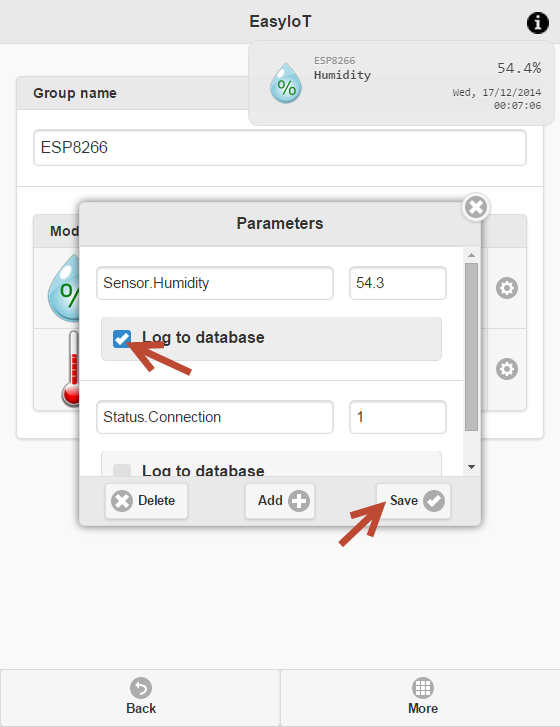
If you want log to database enable logging.
Now it is possible to see sensor data in Web interface.
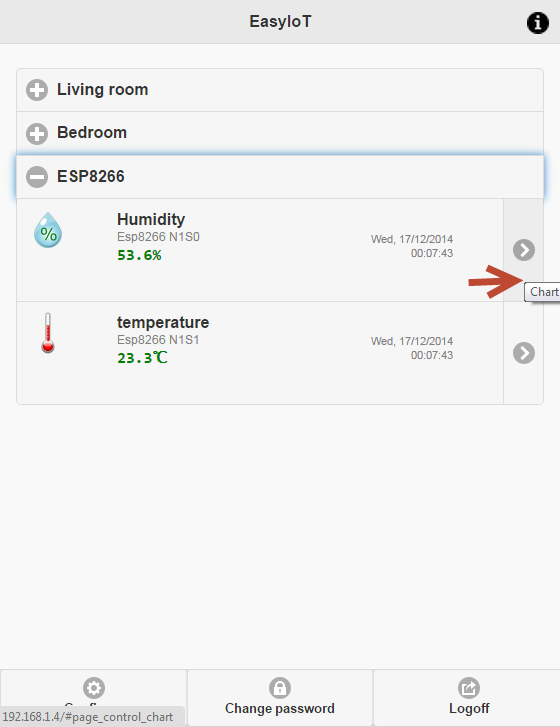
Temperature chart.

In next post we will show how to create more sensors with ESP8266 and EasyIoT server.
Check also EasyIoT Cloud ESP8266 DHT22 temperature/humidity sensor.
See more tutorials at http://iot-playground.com/build
Buying guide
To support this site and EasyIoT framework development please buy in our store.


Comments
Hello,
Finally, after i reflashed again the arduino and it works.
Many Thanks,
John
Please join forum and read this thread:
http://iot-playground.com/forum/esp8266-easyiot-driver/83-esp8266-wifi-temperature-and-humidity-sensor?start=30#1302
You can debug in ArduinoIDE if you enable debugging, and in terminal window for EasyIoT server.
I tried all the step but no luck. the server (0.7 and 0.8 windows version) try to add module but always timeout. But sometimes it discover it but the temp does not move.
Any step i missed ?
now the ESP LED blue is flashing. I set the ESP baud to 9600.
How can i know the arduino can capture the DHT22 data? and how can i know the server capture the data from arduino?
Thanks. john
You can use more sensors, even use different sensors on same Arduino board. This are only example programs. Build device that suits your need. Right now I'm building thermostat with DHT22, LCD TFT, air pessure sensor, RTC and relay.
Yes you can do it with ESP, but not with ESP EeasyIoT library. It can send data only to EasyIoT server.
I'm trying to do this, but is it possible to have the arduino to send the temperature to a php web site? or the ESP is not capable of this?
thanks!
RSS feed for comments to this post